Introduction
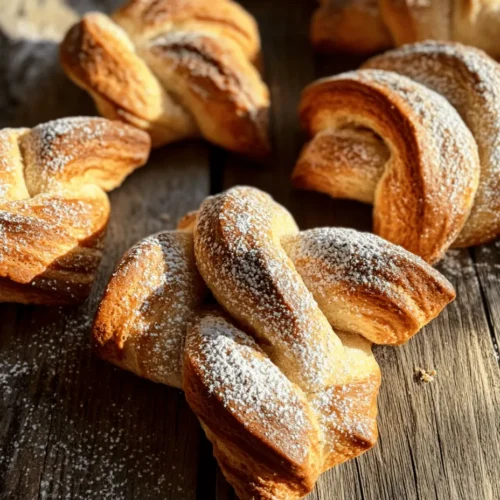
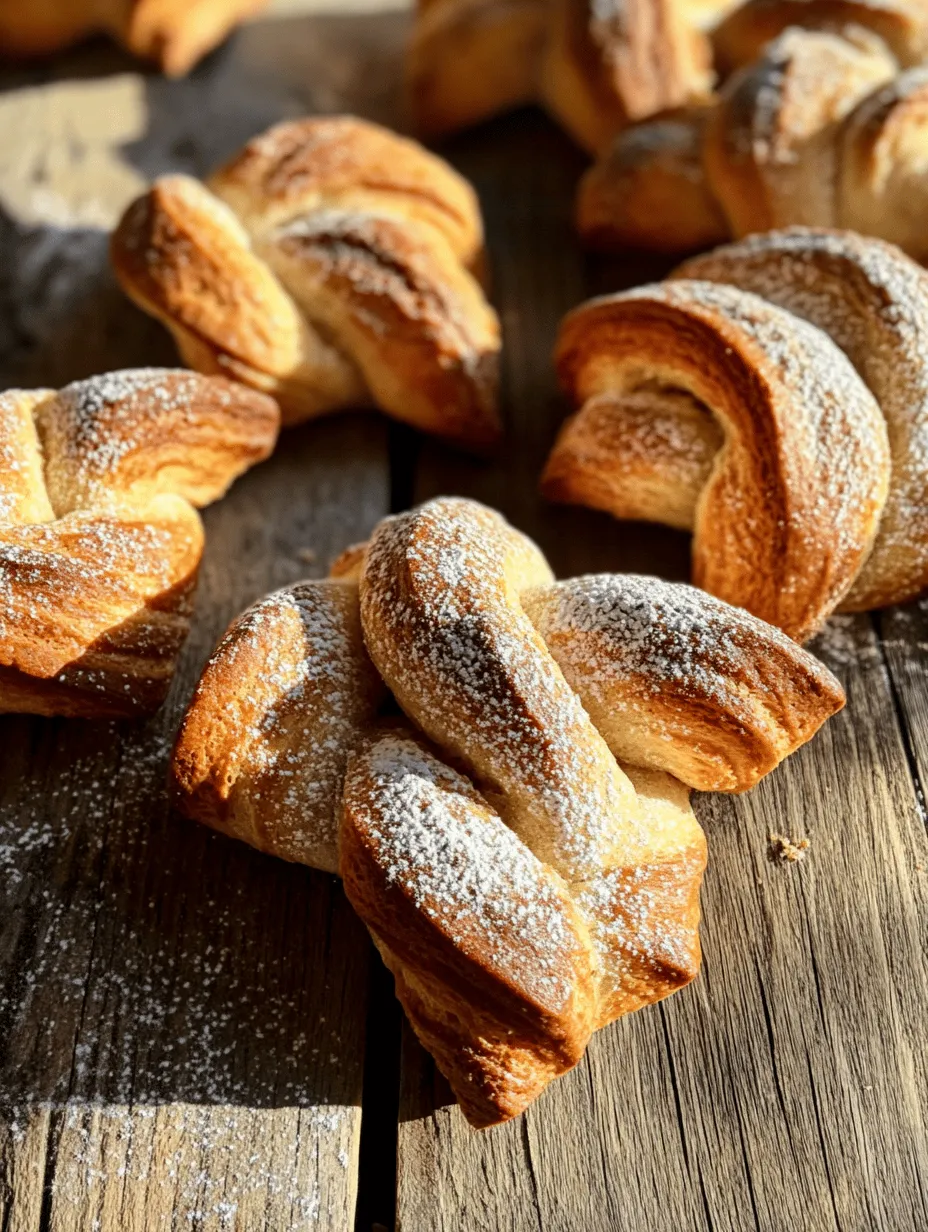
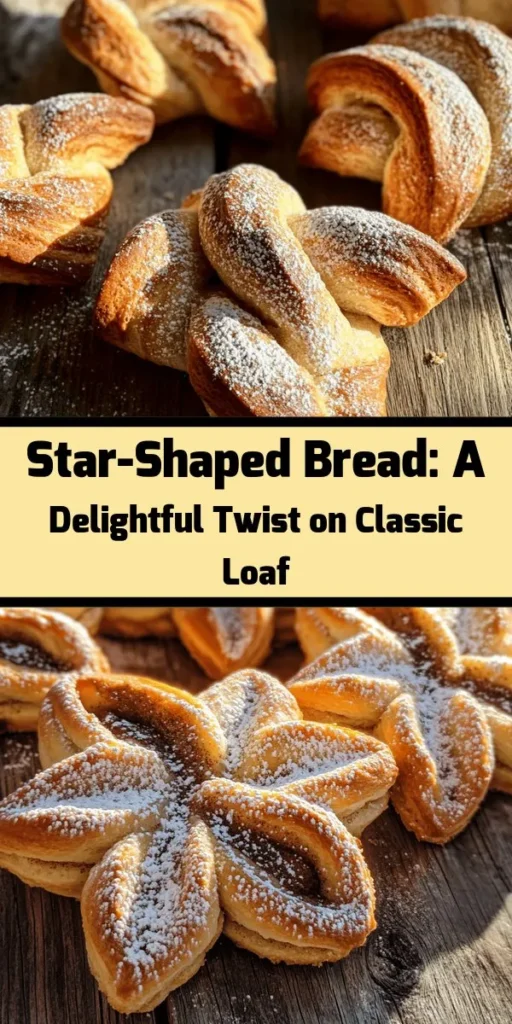
Twinkling Star Bread is more than just a loaf of bread; it’s a dazzling centerpiece that can elevate any gathering or celebration. This visually stunning bread, shaped like a star, is not only a feast for the eyes but also a delightful treat for the taste buds. Imagine serving up a warm, freshly baked loaf that invites your guests to pull apart its fluffy, sweet layers while marveling at its intricate design. Whether it’s a holiday gathering, a special occasion, or a simple weekend brunch, Twinkling Star Bread brings a touch of joy and festivity to the table.
Homemade baked goods have a unique ability to create memorable experiences—there’s something magical about the aroma of freshly baked bread wafting through your home. Crafting Twinkling Star Bread from scratch allows you to connect with your culinary creativity while delighting your loved ones with a delicious treat. In this comprehensive guide, you will learn everything you need to know to make Twinkling Star Bread, from the essential ingredients to step-by-step instructions. Additionally, we will explore variations and serving suggestions that will inspire you to make this recipe your own.
Understanding the Ingredients
To create the perfect Twinkling Star Bread, understanding your ingredients is crucial. Each component plays a significant role in the overall flavor, texture, and appearance of the bread. Let’s break down the essential ingredients you’ll need:
All-Purpose Flour
All-purpose flour serves as the foundation of our bread, providing the necessary structure and texture. It contains a moderate amount of protein, which helps create gluten—the network that gives bread its chewiness. When selecting flour, look for a high-quality all-purpose flour that will yield a soft, airy loaf. For those who wish to experiment, you can also substitute a portion of the all-purpose flour with bread flour for an even chewier texture.
Instant Yeast
Instant yeast is favored among bakers for its quick activation and ability to rise without the need for proofing. This means you can mix it directly with your dry ingredients, saving time in the dough-making process. The yeast ferments the sugars in the dough, producing carbon dioxide that causes the bread to rise, resulting in a light and fluffy texture. If you’re new to bread-making, instant yeast is a great option to achieve consistent results.
Granulated Sugar
Sugar does more than just sweeten our bread; it plays a vital role in the overall flavor and browning process. When baked, sugar caramelizes, creating a beautiful golden crust that enhances the bread’s appearance. Additionally, sugar helps to activate the yeast, resulting in a better rise. For a sweeter loaf, you can adjust the sugar quantity to suit your taste.
Warm Milk and Unsalted Butter
Warm milk and unsalted butter contribute to the richness and moisture of the dough. When combined, they create a tender crumb and a delightful flavor profile. The warmth of the milk helps to activate the yeast, while the butter adds a velvety texture to the final product. For those who prefer a dairy-free option, you can substitute almond milk or coconut milk and use a vegan butter alternative.
Eggs and Vanilla Extract
Eggs are a crucial ingredient in many bread recipes, including Twinkling Star Bread. They provide structure, moisture, and richness, resulting in a softer crumb. Vanilla extract enhances the overall flavor, adding a subtle sweetness that complements the bread’s filling. If you wish to make the bread egg-free, consider using a flaxseed or chia seed mixture as a binding agent.
Filling Options
The filling options for Twinkling Star Bread are virtually limitless, allowing you to customize the flavor profile to your liking. A classic choice is a blend of brown sugar and cinnamon, which adds warmth and sweetness. Alternatively, you can spread Nutella for a chocolatey twist or use fruit jam for a burst of fruity flavor. Experimenting with different fillings can transform your Twinkling Star Bread into a unique creation each time you bake.
The Dough-Making Process
Now that we have a solid understanding of the ingredients, it’s time to dive into the dough-making process. Creating the perfect dough is a critical step in achieving the desired texture and flavor of your Twinkling Star Bread. Here’s a step-by-step breakdown of how to prepare the dough.
Preparing the Dough
1. Combine the Dry Ingredients: In a large mixing bowl, whisk together the all-purpose flour, granulated sugar, and instant yeast. Make sure to mix thoroughly to ensure even distribution of the ingredients.
2. Mix the Wet Ingredients: In a separate bowl, combine the warm milk, melted unsalted butter, eggs, and vanilla extract. Whisk until the ingredients are well incorporated. The warmth of the milk should not exceed 110°F (43°C) to avoid killing the yeast.
3. Combine Wet and Dry Ingredients: Gradually pour the wet mixture into the dry ingredients, stirring with a wooden spoon or spatula until a shaggy dough forms. At this point, the dough will appear slightly sticky and might not fully come together.
Achieving the Right Dough Consistency
Once you’ve combined the wet and dry ingredients, it’s important to assess the dough’s consistency. The dough should be soft, pliable, and slightly tacky but not overly sticky. If the dough is too sticky, you can add a little more flour, one tablespoon at a time, until you achieve the desired consistency. Conversely, if the dough is too dry, you can add a splash of warm milk to moisten it.
Kneading the Dough
Kneading is a crucial step in developing the gluten structure that gives bread its characteristic chewiness. To knead the dough:
1. Transfer to a Floured Surface: Lightly flour a clean work surface and turn the dough out onto it.
2. Knead the Dough: Using the palms of your hands, push the dough away from you, then fold it back towards you. Rotate the dough a quarter turn and repeat the process. Knead for about 8-10 minutes until the dough becomes smooth and elastic.
3. Check for Doneness: The dough is ready when it springs back when lightly pressed and feels smooth to the touch. If you stretch a small piece of dough and it forms a thin membrane without tearing, you’ve achieved the perfect gluten development.
First Rise
Once your dough is kneaded to perfection, it’s time for the first rise. This process is essential for developing flavor and texture in your Twinkling Star Bread.
1. Prepare for Rising: Lightly grease a large bowl with cooking spray or olive oil, then place the kneaded dough inside. Turn the dough around in the bowl to coat it lightly with oil, which will prevent it from drying out.
2. Cover and Let Rise: Cover the bowl with a clean kitchen towel or plastic wrap to retain moisture. Place it in a warm, draft-free area for about 1 to 1.5 hours, or until the dough has doubled in size. A good rising environment can be created by preheating your oven to the lowest setting for a few minutes and then turning it off, allowing the dough to rise comfortably inside.
The first rise not only allows the dough to expand but also develops complex flavors as the yeast ferments the sugars in the dough. As the dough rises, you can prepare your filling and gather any additional tools you may need for shaping the Twinkling Star Bread.
Stay tuned for the next section, where we will explore how to shape and bake your Twinkling Star Bread, turning your dough into a stunning culinary masterpiece!

Shaping the Star Bread
Dividing and Rolling the Dough
Once your dough has completed its initial rise, it’s time to shape the Twinkling Star Bread. Start by gently punching down the dough to release any trapped air. Transfer the dough to a lightly floured surface. Using a sharp knife or a dough scraper, divide the dough into four equal portions. This method ensures that you’ll have uniform circles, which is essential for an even bake and aesthetic appeal.
To roll out the dough, take one section and flatten it slightly with your hands. Use a rolling pin to carefully roll the dough into a circle with a diameter of about 10-12 inches. The thickness should be around ¼ inch. Repeat this process for the remaining three pieces of dough. It’s important to maintain a consistent thickness to ensure uniform baking and to help the filling distribute evenly.
Layering with Filling
Now that you have your circles of dough, it’s time to add the filling. Choose your favorite filling—be it cinnamon sugar, chocolate spread, or a fruit preserve. Spread the filling evenly over the first layer of dough, leaving a small border around the edges to prevent spillage during the twisting process.
When layering the dough, be mindful of the amount of filling. If you overfill, the bread may become soggy and difficult to twist. A light smear is often enough. Once the first layer is filled, place the second circle of dough on top and repeat the filling process. Continue this pattern until all layers are stacked, finishing with the fourth circle of dough on top.
Cutting and Twisting
To create the signature star shape, you need to cut and twist the dough. Begin by placing a small cup or a round cookie cutter in the center of the dough stack; this will serve as a guide for your cuts. Using a sharp knife or pizza cutter, make 8 evenly spaced cuts from the edge of the dough towards the center, stopping just before you reach the center guide.
Once the cuts are made, take two adjacent sections of dough and twist them away from each other, forming a point of the star. Repeat this step with all sections around the dough until you have twisted all eight points. It may take some practice to achieve the desired look, but the end result will be a beautiful star-shaped bread that is as impressive as it is delicious.
Finalizing the Bread
Second Rise
After shaping your Twinkling Star Bread, the next crucial step is the second rise. This step is vital for achieving that light and fluffy texture we all love in freshly baked bread. Cover the shaped dough lightly with a clean kitchen towel or plastic wrap to prevent it from drying out. Allow it to rise in a warm, draft-free environment for approximately 30-45 minutes, or until it has puffed up noticeably.
Baking the Star Bread
Preheat your oven to 375°F (190°C) while the dough is rising. This temperature is optimal for baking bread, allowing it to develop a golden crust while remaining soft inside. Once the second rise is complete, place the bread in the preheated oven and bake for about 25-30 minutes. Keep an eye on it towards the end of the baking time—if the top is browning too quickly, you can cover it loosely with aluminum foil to prevent burning.
Egg Wash Technique
To achieve a beautiful, glossy finish on your Twinkling Star Bread, apply an egg wash before baking. Beat one egg with a tablespoon of water or milk to create a smooth mixture. Using a pastry brush, gently apply the egg wash over the surface of the dough, making sure to cover all exposed areas. This not only enhances the appearance but also contributes to a delightful golden-brown color.
Serving Suggestions and Presentation
Cooling the Bread
Once your Twinkling Star Bread is done baking, remove it from the oven and let it cool in the pan for about 10 minutes before transferring it to a wire rack. This cooling period allows the steam to escape, ensuring that the bread doesn’t become soggy. For the best experience, serve the bread while it is still warm; the aroma and the taste are simply irresistible.
Dusting with Powdered Sugar
When ready to serve, consider dusting the top of the bread with powdered sugar for an added touch of sweetness and visual appeal. To do this, place a small amount of powdered sugar in a fine-mesh sieve and gently shake it over the cooled bread. This simple step can elevate the presentation, making it even more inviting.
Ideas for Serving
Twinkling Star Bread pairs beautifully with a cup of coffee or tea, making it an ideal treat for brunch or afternoon tea. It can also serve as a stunning centerpiece for festive occasions. Consider placing it on a decorative platter, perhaps surrounded by fresh fruits or sprigs of greenery, to enhance the visual impact. This bread is versatile and can be enjoyed as a sweet breakfast option or as a delightful dessert.
Variations and Customization
Exploring Alternative Fillings
While the classic filling options such as cinnamon sugar or chocolate are undoubtedly delicious, don’t hesitate to get creative! Consider savory fillings like herb-infused cheese, pesto, or even sun-dried tomatoes for a unique twist. For an Italian-inspired version, try filling with ricotta cheese and spinach. The possibilities are endless, allowing you to tailor the bread to your personal taste preferences or the occasion.
Adjusting Sweetness Levels
If you prefer a less sweet bread, you can easily adjust the sweetness of the filling. Reduce the sugar content in your filling or opt for naturally sweet ingredients like mashed bananas or applesauce. This way, you can create a version of Twinkling Star Bread that caters to those with varying taste preferences.
Gluten-Free and Vegan Alternatives
For those with dietary restrictions, adapting the Twinkling Star Bread recipe is possible. Use gluten-free all-purpose flour to make a gluten-free version of the bread. Ensure that all other ingredients, including the filling, are gluten-free as well.
For a vegan alternative, replace the egg in the dough with a flaxseed egg (1 tablespoon of ground flaxseed mixed with 3 tablespoons of water) and use a plant-based milk in the dough and egg wash. Many fillings, such as fruit preserves or nut butters, are naturally vegan, making this recipe versatile for different dietary needs.
Conclusion
Making Twinkling Star Bread at home is not only a rewarding culinary experience but also a delightful way to bring joy to your family and friends. The process of shaping, filling, and baking creates a sense of accomplishment, while the stunning final product is sure to impress anyone who shares in the experience.
Don’t shy away from experimenting with different fillings and variations, allowing you to personalize the recipe to suit your taste or the occasion. Whether you choose to serve it at a festive gathering or as a special treat for yourself, homemade bread leaves a lasting impression that is cherished by all. With a little creativity and practice, Twinkling Star Bread can become a beloved staple in your recipe repertoire, creating memories that will be enjoyed for years to come.