
Introduction
Arabic cuisine is a vibrant tapestry of flavors, colors, and traditions that reflects the rich history and diverse cultures of the Arab world. Renowned for its use of aromatic spices, fresh ingredients, and unique cooking methods, Arabic food has captivated the palates of people around the globe. Among its many delightful offerings, one standout staple is the Fluffy Arabic Dough Pockets, also known as “Pita Bread” or “Khobz.”
These dough pockets are incredibly versatile, serving as the perfect accompaniment to a variety of dishes, from savory stews and grilled meats to fresh salads and dips like hummus. Their fluffy texture and pockets make them ideal for stuffing with delicious fillings, turning them into a meal all on their own. In this article, we will delve into the intricate process of making these delectable dough pockets, providing you with a detailed recipe while also exploring the cultural significance behind them.
Understanding the Ingredients
Before we embark on our culinary journey to create Fluffy Arabic Dough Pockets, it’s essential to understand the key ingredients that will bring this recipe to life. Each component plays a crucial role in achieving the perfect texture and flavor of the dough.
All-Purpose Flour
All-purpose flour is the backbone of many baking recipes, including our Fluffy Arabic Dough Pockets. This versatile ingredient is milled from a blend of hard and soft wheat, making it suitable for a wide range of baked goods. In this recipe, all-purpose flour provides the necessary structure and elasticity for the dough.
When selecting flour, look for a high-protein variety, as this will help develop gluten, which is responsible for the dough’s chewiness and ability to rise. The proper handling and mixing of the flour will significantly affect the final product, so understanding its properties is vital in achieving that fluffy, light texture we desire.
The Role of Salt in Baking
Salt is often an overlooked ingredient in many recipes, but it plays a critical role in baking. In our dough, salt not only enhances the flavor but also regulates the fermentation process. It helps control yeast activity, ensuring that the dough rises at a steady pace, preventing it from becoming too airy or dense.
Moreover, salt strengthens gluten structure, which contributes to the dough’s overall texture. When mixing your ingredients, be sure to incorporate salt evenly throughout the flour to maximize its effects.
Sugar’s Function in Dough Recipes
Sugar is another essential component in our Fluffy Arabic Dough Pockets. While it may seem counterintuitive to add sugar to a savory recipe, it serves several important functions. First, sugar acts as a food source for yeast, promoting its activation and ensuring a well-risen dough. When yeast consumes sugar, it produces carbon dioxide, which helps create the pockets in the dough.
Additionally, sugar enhances the flavor of the dough, balancing out the saltiness and contributing to a subtle sweetness that complements various fillings. In this recipe, a small amount of sugar is all you need to achieve the desired results.
Instant Yeast vs. Active Dry Yeast
When it comes to leavening agents, we have two popular options: instant yeast and active dry yeast. While both serve the same purpose of fermenting the dough, they differ in their processing and usage. Instant yeast is milled into finer particles and does not require activation in warm water before use, making it a convenient choice for quick recipes.
In contrast, active dry yeast must be dissolved in warm water before being added to the dough. For our Fluffy Arabic Dough Pockets, we will use instant yeast due to its ease of use and faster fermentation time. This means you can enjoy your dough pockets even sooner!
The Significance of Warm Water
Water is a vital ingredient in any dough recipe, and its temperature can significantly impact the yeast’s activity. Warm water, typically between 100°F and 110°F (37°C to 43°C), is ideal for activating yeast, as it encourages fermentation without killing the yeast cells.
When mixing your dough, gradually add warm water to the dry ingredients, allowing the yeast to dissolve and activate fully. This step is crucial for ensuring that your dough rises adequately and results in those delightful fluffy pockets.
Olive Oil in Dough Making
Finally, we have olive oil, which adds richness and flavor to our dough. The inclusion of olive oil not only enhances the taste but also contributes to the overall texture, making the dough softer and more pliable. The fat in olive oil coats the flour particles, preventing excessive gluten formation and resulting in a tender pocket.
In addition to its functional benefits, olive oil lends a subtle Mediterranean flavor that complements the other ingredients beautifully. When incorporating olive oil into the dough, be sure to mix it evenly to achieve a consistent texture throughout.
Step-by-Step Guide to Making Fluffy Arabic Dough Pockets
Now that we understand the importance of each ingredient, let’s dive into the step-by-step process for making Fluffy Arabic Dough Pockets. This straightforward method will guide you through preparing the dough, kneading it, and getting it ready for cooking.
Preparing the Dough
To start, gather all your ingredients and ensure you have a clean working surface. Begin by measuring out your all-purpose flour and pouring it into a large mixing bowl. Next, add the salt and sugar, combining them evenly with the flour using a whisk or a fork. This ensures that the flavors are well distributed throughout the dough.
Once the dry ingredients are mixed, create a well in the center of the flour mixture. This well will serve as a reservoir for your wet ingredients. Gradually pour in the warm water while gently stirring with a wooden spoon or your hands. This gradual addition is crucial; it allows the flour to absorb the water without becoming overly sticky.
Kneading the Dough
After the water is incorporated, it’s time to knead the dough. Turn the mixture out onto a lightly floured surface and begin kneading with your hands. Kneading is an essential step in developing gluten, which will give your dough its structure and chewiness.
To knead effectively, push the dough away from you with the heel of your hand, then fold it back over itself. Rotate the dough a quarter turn and repeat the process. Continue kneading for about 8 to 10 minutes, or until the dough is smooth and elastic. If the dough feels too sticky, you can sprinkle a little more flour, but be cautious not to add too much, as this can lead to a dense pocket.
As you knead, you’ll notice the dough becoming softer and more pliable, which is exactly what you want. Once your dough has reached the right consistency, form it into a ball and place it in a lightly greased bowl. Cover the bowl with a clean kitchen towel or plastic wrap, and let it rise in a warm, draft-free area for about 1 to 1.5 hours, or until it has doubled in size.
—
In this first part of our detailed recipe article, we’ve explored the cultural significance of Fluffy Arabic Dough Pockets, the essential ingredients that contribute to their unique texture and flavor, and the initial steps to prepare the dough. With a solid understanding of these fundamentals, you’re well on your way to creating delicious, fluffy pockets that can be enjoyed with a variety of fillings. Stay tuned for the next part, where we will continue with the shaping, cooking, and serving of these delightful dough pockets.
Signs of Properly Kneaded Dough
Kneading is a crucial step in the process of making Fluffy Arabic Dough Pockets. Properly kneaded dough should exhibit specific characteristics that indicate readiness for the next step. A well-kneaded dough will be smooth and elastic, easily able to stretch without tearing. When you poke the dough with a finger, it should spring back gently, indicating that the gluten has developed well. Additionally, the dough should not be sticky; if it sticks to your fingers or the work surface, it likely needs more flour or additional kneading.
The Rising Process
After kneading, the dough enters the crucial rising phase. This step is where the magic of yeast takes place, allowing your dough pockets to achieve that fluffy texture we all love. During rising, yeast ferments the sugars present in the dough, producing carbon dioxide gas and alcohol. The gas bubbles get trapped in the gluten structure, causing the dough to expand and rise.
Explanation of How Yeast Works During the Rise
Yeast is a living organism that plays a vital role in baking. When activated, it feeds on the sugars in the flour and produces carbon dioxide and alcohol through a process called fermentation. The carbon dioxide gas forms bubbles in the dough, which causes it to puff up. This process not only makes the dough rise but also contributes to flavor development. It’s essential to use fresh yeast, as old yeast can lead to a flat dough with poor texture.
Ideal Conditions for Dough Rising
For optimal rising, the dough should be placed in a warm, draft-free area. An ideal temperature is around 75°F to 85°F (24°C to 29°C). If your kitchen is too cold, you can create a warm environment by turning your oven on to the lowest setting for a few minutes, then turning it off and placing the dough inside with the door slightly ajar. Cover the bowl with a damp kitchen towel or plastic wrap to retain moisture. The dough should ideally double in size within 1 to 2 hours, depending on the environmental conditions and yeast used.
Shaping the Dough
Once the dough has risen adequately, it’s time to shape it into individual pockets. This step is essential for ensuring uniform cooking and presentation.
Techniques for Dividing and Shaping into Balls
Start by gently punching down the risen dough to release the gas. Transfer it to a lightly floured surface and divide it into equal portions, usually about 8 to 10 pieces, depending on the size you prefer for your dough pockets. Roll each piece into a ball by cupping your hand over the dough and moving it in a circular motion against the surface. This technique helps create a smooth surface that will rise evenly when cooked.
How to Roll Dough Circles Evenly
To roll the dough into circles, dust your work surface and rolling pin with flour to prevent sticking. Take one dough ball and flatten it slightly with your palm before rolling it out into a circle. Aim for a thickness of about 1/4 inch. To ensure even thickness, start rolling from the center outward, rotating the dough a quarter turn after each roll. This technique helps achieve a uniform shape, which is critical for even cooking.
Cooking Techniques for Perfect Dough Pockets
Preheating the Skillet: Importance and Tips
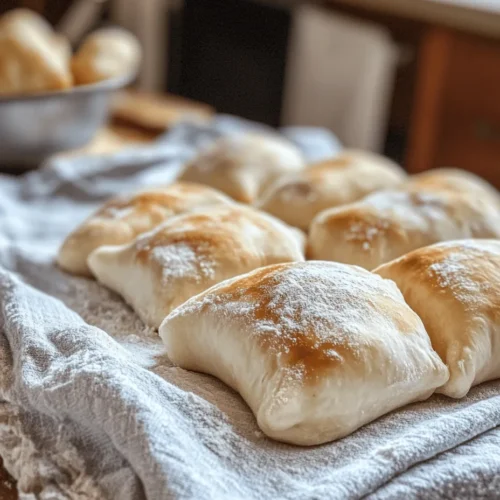
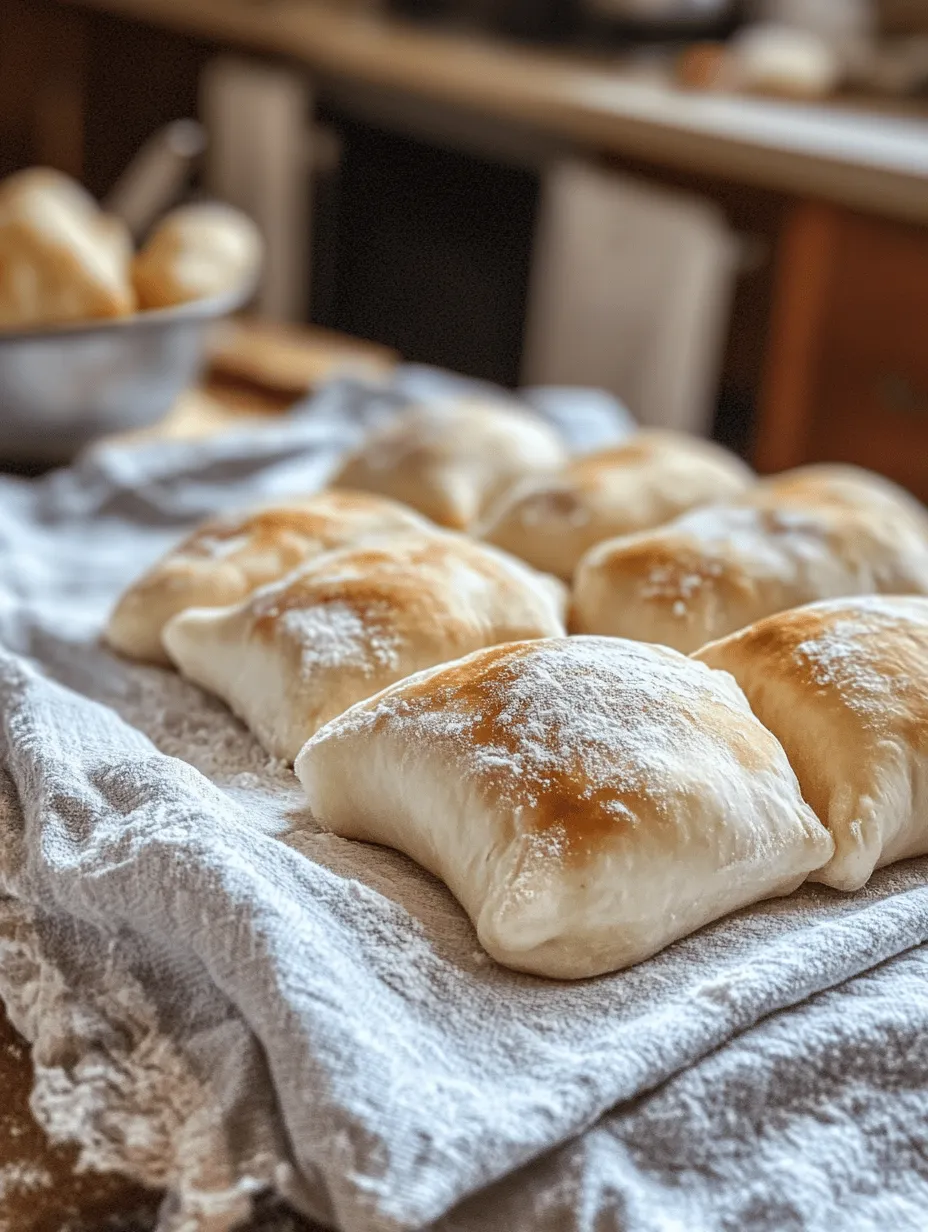
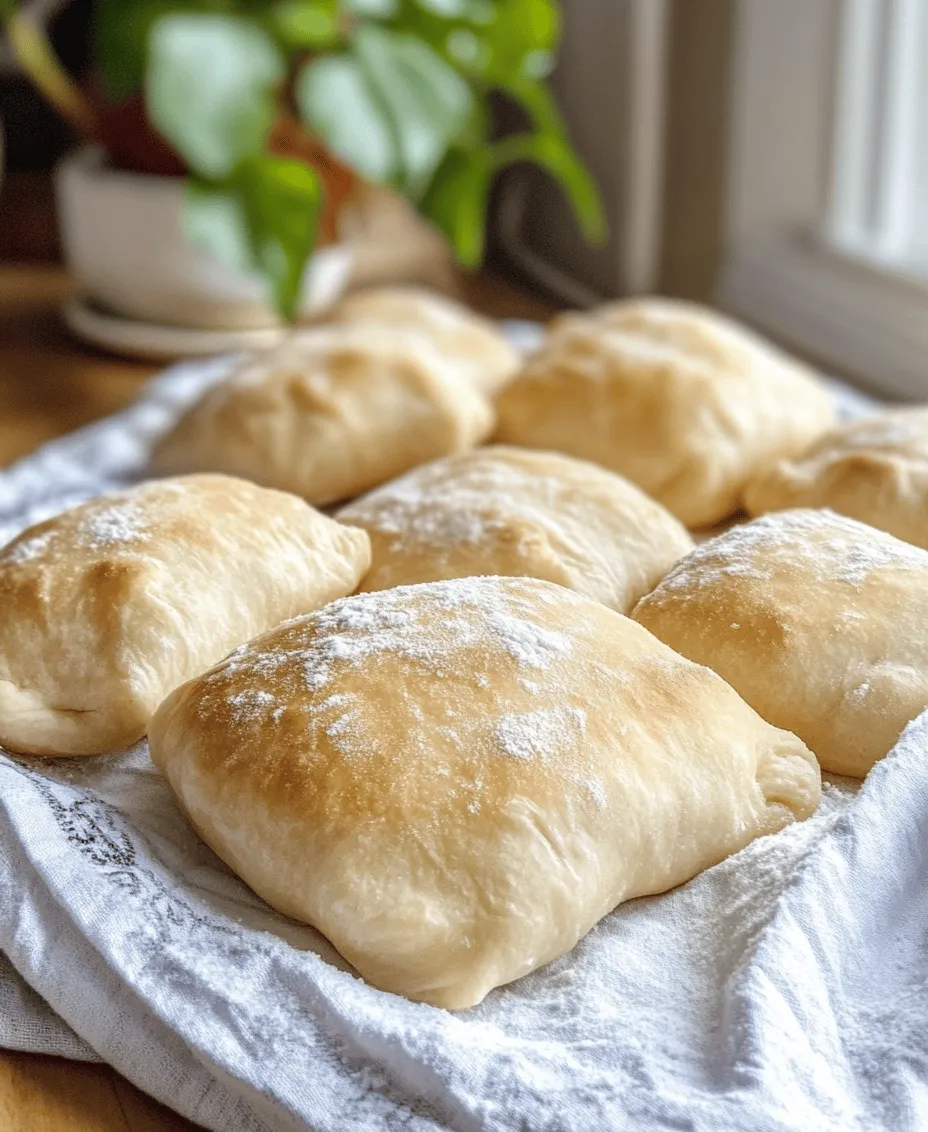
A well-preheated skillet is essential for achieving the perfect puff and color in your dough pockets. Heat your skillet on medium-high heat for at least 5 minutes before placing the dough in. You can test if the skillet is hot enough by sprinkling a few drops of water onto the surface; if they sizzle and evaporate immediately, it’s ready. This high heat creates steam inside the dough pockets, resulting in a fluffy texture.
Cooking Process: Achieving the Perfect Puff and Color
Once the skillet is hot, place the rolled dough circles in the skillet, leaving space between each one. Cook for about 1-2 minutes on one side until bubbles form on the surface. Using a spatula, flip the dough and cook for an additional 1-2 minutes. The goal is to achieve a golden-brown color with puffed-up edges. If the dough doesn’t puff up, it may need a bit more heat or cooking time.
Tips for Maintaining Warmth and Texture Post-Cooking
After cooking, keep the dough pockets warm by wrapping them in a clean kitchen towel or placing them in a warmed oven. This will help maintain their softness and prevent them from drying out. Avoid stacking the hot dough pockets directly on top of each other, as this can cause them to become soggy.
Serving Suggestions
Fluffy Arabic Dough Pockets are incredibly versatile and can be filled with a variety of delicious ingredients. Here are some popular filling ideas:
Popular Fillings for Arabic Dough Pockets
1. Meats: Shredded chicken, lamb, or beef are excellent choices. Spiced meats enhance the flavor and can be mixed with onions and herbs for added depth.
2. Vegetables: For a vegetarian option, consider filling your dough pockets with sautéed bell peppers, eggplant, or spinach mixed with feta cheese.
3. Dips: Serve your dough pockets with traditional dips such as hummus, baba ganoush, or tzatziki for a delightful appetizer or side.
Pairing Ideas with Traditional Dishes
These dough pockets pair well with a variety of traditional Middle Eastern dishes. Serve them alongside dishes like tabbouleh, falafel, or grilled kebabs to create a full meal experience. They are also perfect for stuffing with leftover stews or curries for a quick and satisfying lunch.
Recommended Sides and Accompaniments
To complement your Fluffy Arabic Dough Pockets, consider serving them with a fresh salad, pickled vegetables, or a bowl of yogurt infused with garlic and herbs. These sides not only enhance the meal but also add vibrant colors and textures to your dining experience.
Cultural Significance of Arabic Dough Pockets
The history of bread in Arabic cultures dates back thousands of years, making it a staple in many households. Bread is often associated with hospitality and communal gatherings, symbolizing nourishment and connection.
Historical Context of Bread in Arabic Cultures
Traditionally, bread has been a fundamental part of Arabic cuisine, with various forms enjoyed across the region. From flatbreads to stuffed pastries, each culture has its unique methods and recipes, reflecting local ingredients and traditions.
Variations Across Different Regions in the Middle East
Each region in the Middle East boasts its own variations of dough pockets. For example, the Lebanese man’ousheh features a dough topped with za’atar and olive oil, while Turkish gözleme is filled with cheese and spinach. These regional differences showcase the diversity of flavors and cooking styles found within Arabic culinary traditions.
How These Dough Pockets Fit into Modern Culinary Traditions
In contemporary cuisine, Fluffy Arabic Dough Pockets have transcended traditional boundaries, becoming popular worldwide. They are often seen at street food markets and gourmet restaurants alike, where chefs experiment with innovative fillings and presentation styles, making this age-old dish accessible to a new generation of food lovers.
Conclusion
Making Fluffy Arabic Dough Pockets is a rewarding experience that marries simplicity with versatility. This recipe allows for endless customization, whether you choose to fill them with savory meats, fresh vegetables, or delightful dips. The joy of creating and sharing these dough pockets with friends and family is an integral part of the cooking experience. So don’t hesitate to explore your variations and fillings, embracing the flavors and traditions that resonate with you. Enjoy the process of making these delightful pockets and the warm connections they foster around the dining table.