Introduction to Chewy Peanut Butter Granola Bars
In recent years, there has been a noticeable shift towards homemade snacks, as more people strive to make healthier lifestyle choices. The drive for convenient yet nutritious food options has led to a surge in the popularity of granola bars. These delightful treats not only cater to the demands of busy lifestyles but also offer a substantial energy boost, making them an excellent choice for on-the-go snacking. Whether you are a student rushing to class, a busy professional seeking a quick breakfast, or a parent needing a wholesome snack for your kids, granola bars come to the rescue.
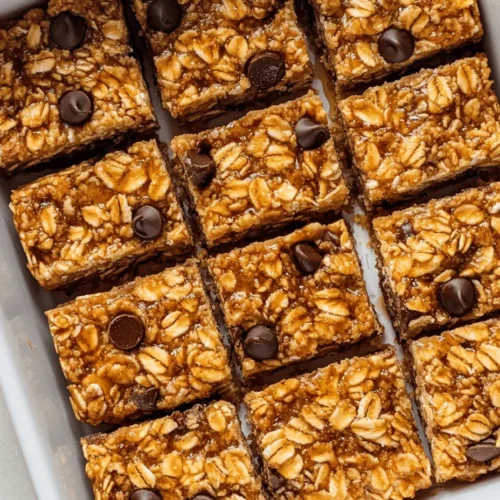
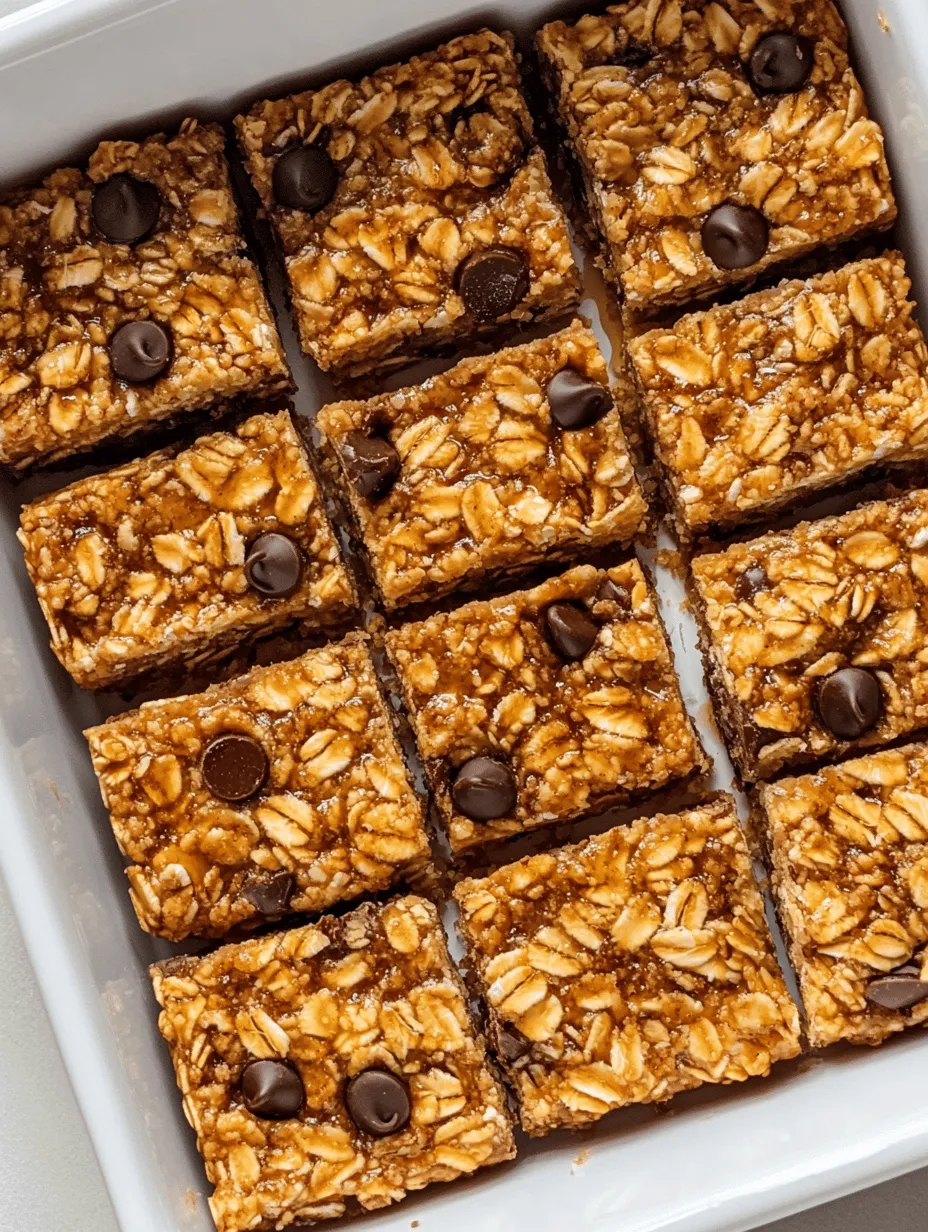
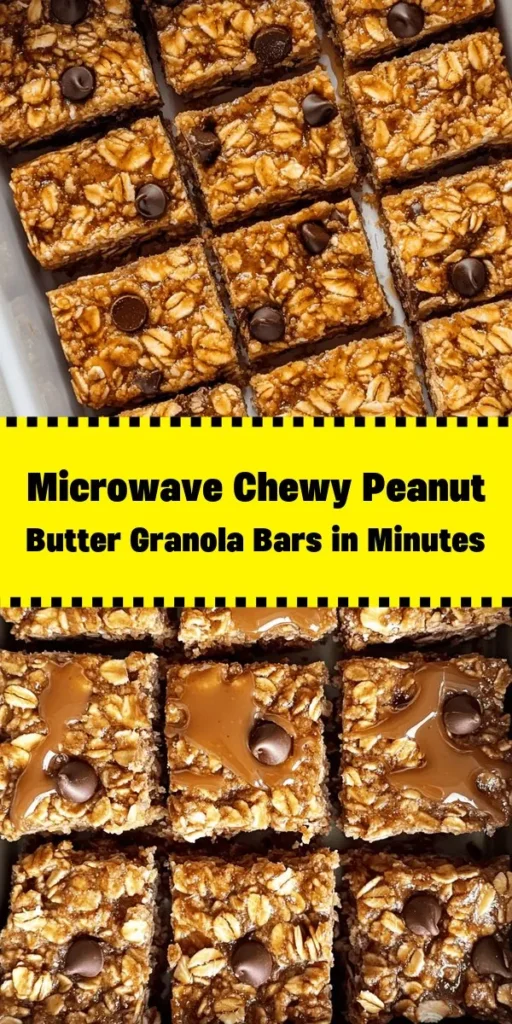
Among the myriad of recipes available, the Easiest Microwave Chewy Peanut Butter Granola Bars stand out as a particularly appealing option. This recipe embodies simplicity and speed, allowing you to whip up a batch of delicious, chewy granola bars in a matter of minutes. With just a few staple ingredients, you can create a satisfying snack that is both delicious and nutritious. This article will guide you through the background, ingredients, and initial steps of making these scrumptious bars, ensuring that you have all the knowledge you need to succeed in your culinary adventure.
Understanding the Ingredients
Old-Fashioned Oats
At the heart of any granola bar recipe lies the humble oat. Old-fashioned oats, also known as rolled oats, are the preferred choice for granola bars due to their texture and nutritional profile. These oats undergo minimal processing, allowing them to retain their fiber content, which is crucial for promoting digestive health. They serve as the backbone of your granola bars, providing not only structure but also a chewy texture that makes these bars satisfying to eat.
Nutritionally, old-fashioned oats are a powerhouse of energy. They are rich in complex carbohydrates, which release energy slowly and help maintain stable blood sugar levels. Additionally, they contain essential vitamins and minerals, including B vitamins, iron, and magnesium, making them a wholesome addition to your diet. Incorporating oats into your granola bars ensures that you have a nutrient-dense snack that can keep you fueled throughout the day.
Peanut Butter
Peanut butter is another star ingredient in our chewy granola bars, contributing to both flavor and nutritional value. You can choose between smooth and crunchy varieties, and each brings its unique charm to the final product. Smooth peanut butter blends seamlessly into the mixture, creating a creamy consistency, while crunchy peanut butter adds delightful texture and an extra crunch in every bite.
The health benefits of incorporating peanut butter are numerous. It is an excellent source of protein, which aids in muscle repair and growth, making it a great snack option before or after workouts. Additionally, peanut butter is rich in healthy fats, particularly monounsaturated fats, which can support heart health when consumed in moderation. It also contains essential nutrients like vitamin E, magnesium, and potassium, further enhancing the nutritional profile of your granola bars.
Honey vs. Maple Syrup
When it comes to sweetening your granola bars, you have options! Honey and maple syrup are both popular natural sweeteners, each bringing its distinctive flavor and benefits to the table. Honey is a classic choice in granola bars, offering a floral sweetness that complements the nutty flavor of peanut butter beautifully. It also boasts antimicrobial properties and can provide a quick energy boost, making it an ideal ingredient for active individuals.
On the other hand, maple syrup offers a rich, caramel-like flavor that can elevate your granola bars to new heights. It is a great alternative for those looking for vegan options, as it is derived from the sap of sugar maple trees. Nutritionally, maple syrup contains antioxidants and minerals like manganese and zinc, adding to its appeal as a natural sweetener.
The Importance of Brown Sugar
Brown sugar is another key ingredient that contributes to the chewiness and flavor depth of your granola bars. Unlike white sugar, brown sugar retains some of the natural molasses, which imparts moisture and a hint of caramel flavor. This moisture is essential for achieving that desired chewy texture in your bars. Additionally, the slight acidity of brown sugar can help balance the sweetness of honey or maple syrup, creating a more complex flavor profile.
The Role of Chocolate Chips
While chocolate chips are an optional ingredient, they can take your granola bars to the next level. They add a touch of indulgence and can be customized according to your preferences—dark, milk, or even white chocolate. Not only do chocolate chips enhance the flavor, but they also provide a delightful contrast to the wholesome taste of oats and peanut butter. Feel free to experiment with different types of chocolate or even other mix-ins like dried fruits or nuts, catering to your personal taste.
Significance of Vanilla Extract and Salt
The final touches to your granola bars come from vanilla extract and a pinch of salt. Vanilla extract enhances the overall flavor, infusing your bars with a warm, inviting aroma. It works harmoniously with the other ingredients, elevating the taste without overpowering it. Meanwhile, a small amount of salt is crucial for balancing sweetness. It helps to round out the flavors and enhance the overall taste of your granola bars, making them even more enjoyable.
Step-by-Step Instructions for Microwave Chewy Peanut Butter Granola Bars
Preparation: Gathering Tools and Materials Needed
Before diving into the cooking process, it’s essential to gather all the necessary tools and materials. This preparation step will streamline your cooking experience and ensure that you have everything at your fingertips.
Essential Kitchen Equipment:
– Microwave-safe bowl: This will be used for melting your wet ingredients.
– Mixing spoon: A sturdy spoon or spatula will help you combine your ingredients effectively.
– Baking dish: A square or rectangular dish is ideal for shaping your granola bars.
Once you have your equipment ready, you can move on to the fun part—combining the ingredients.
Combining the Wet Ingredients
Start by measuring out your peanut butter, honey (or maple syrup), and brown sugar. Place these ingredients into your microwave-safe bowl. Microwaving these ingredients together is not only convenient but also helps achieve a smooth and well-blended consistency. Heat the mixture in the microwave for about 30 seconds, then stir. If necessary, microwave for an additional 15-30 seconds until everything is melted and combined. The heat will help to soften the peanut butter and dissolve the brown sugar, making it easier to mix.
Incorporating Oats into the Mixture
Once your wet ingredients are thoroughly blended, it’s time to bring in the old-fashioned oats. Gradually add the oats to your peanut butter mixture, stirring continuously to ensure that all the oats are evenly coated. This step is crucial as it helps prevent clumping and ensures that every bite of your granola bar is flavorful. For the best results, use quick, gentle motions to avoid crushing the oats too much, as you want to maintain their integrity for that chewy texture.
Preparing the Baking Dish
While you are mixing the ingredients, you can prepare your baking dish. Line the bottom and sides of the dish with parchment paper, allowing a bit of overhang on the edges. This is an important step as it will make it easy to lift the granola bars out once they are set. Plus, it minimizes the cleanup process, making your cooking experience more enjoyable.
Spreading and Pressing the Mixture
After combining the oats with the wet ingredients, transfer the mixture into your prepared baking dish. Using a spatula or the back of a spoon, spread the mixture evenly across the dish. Be sure to press it down firmly to ensure that the granola bars hold together once they are set. This step is critical for achieving the perfect density and firmness. A well-pressed mixture will yield chewy bars that are easy to cut and enjoy.
Refrigeration: Why It’s Crucial for Setting the Bars
Once the mixture is evenly spread and pressed into the baking dish, it’s time to refrigerate. This step is crucial as it allows the granola bars to set properly, ensuring they develop a chewy texture that holds together well. Cover the dish with plastic wrap or an additional layer of parchment paper to prevent any unwanted odors from affecting your treats. Let the mixture chill in the refrigerator for at least 1-2 hours, or until it is firm enough to cut into bars.
As you wait for the bars to set, you can take a moment to clean up your workspace and prepare for the final cutting and serving steps. The anticipation of enjoying your homemade chewy peanut butter granola bars will surely make the wait worthwhile!
The Science Behind Cooling and Firming Ingredients
After you’ve microwaved your mixture to create the chewy peanut butter granola bars, allowing them to cool is crucial for achieving the right texture. When the mixture is hot, the ingredients are malleable, and the sugars are in a liquid state, which means they haven’t yet set. Cooling allows the sugars to crystallize and the fats to solidify, which helps the bars hold their shape when cut.
To ensure a perfect set, let the granola bars cool in the pan at room temperature for at least 30 minutes. For quicker cooling, you can place the pan in the refrigerator for about 15 minutes. The key is to avoid cutting them too soon, as this can lead to crumbly bars that fall apart instead of maintaining a chewy consistency.
Cutting the Bars: Achieving Uniform Sizes for Serving
Once the granola bars have cooled and firmed up, it’s time to cut them into uniform sizes. This step is essential not only for presentation but also for portion control. A good rule of thumb is to aim for bars that are about 2 inches wide and 4 inches long.
To achieve uniform sizes, use a sharp knife or a pizza cutter for clean cuts. You can lightly score the surface of the bars before cutting all the way through to ensure even portions. If you prefer bite-sized snacks, feel free to cut them into smaller squares. Keeping the shapes consistent will help with storage, as they will stack neatly in containers.
Suggestions for Cutting Techniques to Maintain Shape
To maintain the shape of your granola bars, consider the following cutting techniques:
1. Chill Before Cutting: As mentioned, chilling the bars in the refrigerator before cutting can firm them up even more, making them easier to cut without crumbling.
2. Use a Slicing Guide: If you have a ruler or a cutting board with measurements, use it to guide your cuts for even sizes.
3. Clean Cuts: Make sure to wipe your knife between cuts to avoid sticking, which can cause the bars to break apart.
4. Cut in a Single Motion: Instead of sawing back and forth, try to cut straight down in one motion. This technique minimizes the pressure that can crush the bars.
Storage and Freshness of Granola Bars
Proper storage is vital for maintaining the freshness of your homemade granola bars. Here are some best practices to consider:
Best Practices for Storing Granola Bars
Store your granola bars in an airtight container to keep out moisture and air, which can lead to spoilage. If you’ve cut them into individual bars, you can separate layers with parchment paper to prevent sticking.
Airtight Containers vs. Refrigeration for Longevity
While an airtight container at room temperature works well for short-term storage (up to one week), refrigeration can extend their freshness. If you prefer a firmer texture, consider refrigerating your bars, where they will last for about two weeks.
Shelf Life: How Long Can You Keep Homemade Granola Bars?
Homemade granola bars typically last about one week at room temperature, two weeks in the refrigerator, and can be frozen for up to three months. If you choose to freeze them, wrap each bar individually in plastic wrap, then place them in a freezer-safe bag.
Signs of Spoilage: When to Discard Your Homemade Snacks
Always check for signs of spoilage before consuming your granola bars. If you notice a change in texture, an off smell, or visible mold, it’s best to discard them. Fresh granola bars should have a pleasant nutty aroma and retain a chewy texture.
Nutritional Benefits of Chewy Peanut Butter Granola Bars
Understanding the nutritional profile of your homemade chewy peanut butter granola bars can help you make informed dietary decisions.
Breakdown of Macronutrients Per Serving
Each serving (typically one bar) contains approximately:
– Calories: 200-250, depending on added ingredients
– Protein: 6-10 grams, thanks to the peanut butter and any added nuts
– Fats: 8-12 grams, primarily from nut butters and seeds
– Carbohydrates: 25-30 grams, mainly from oats and honey
Health Implications of Making Your Own Snacks Versus Store-Bought Options
By making your own granola bars, you have control over the ingredients, allowing you to avoid high levels of added sugars, preservatives, and artificial flavors often found in store-bought snacks. This can lead to a healthier snacking option that aligns with your dietary goals.
Potential Dietary Modifications
For those with dietary restrictions or preferences, consider the following modifications:
– Gluten-Free: Use certified gluten-free oats.
– Sugar-Free: Substitute honey with mashed bananas or apple sauce.
– Vegan: Replace honey with maple syrup and use vegan chocolate chips if desired.
Customization Options for Granola Bars
One of the best aspects of making your own granola bars is the ability to customize them to suit your taste preferences and dietary needs.
Additional Mix-Ins for Enhanced Flavor and Nutrition
Enhance the flavor and nutrition of your granola bars with various mix-ins. Consider incorporating:
– Dried Fruits: Raisins, cranberries, or apricots add natural sweetness and chewiness.
– Nuts and Seeds: Almonds, walnuts, pumpkin seeds, or flax seeds can provide added crunch and healthy fats.
– Spices: A dash of cinnamon or nutmeg can elevate the flavor profile.
Flavor Variations Beyond Peanut Butter
While peanut butter is a classic choice, don’t hesitate to explore other nut butters, such as almond butter or sunflower seed butter, for a different flavor twist.
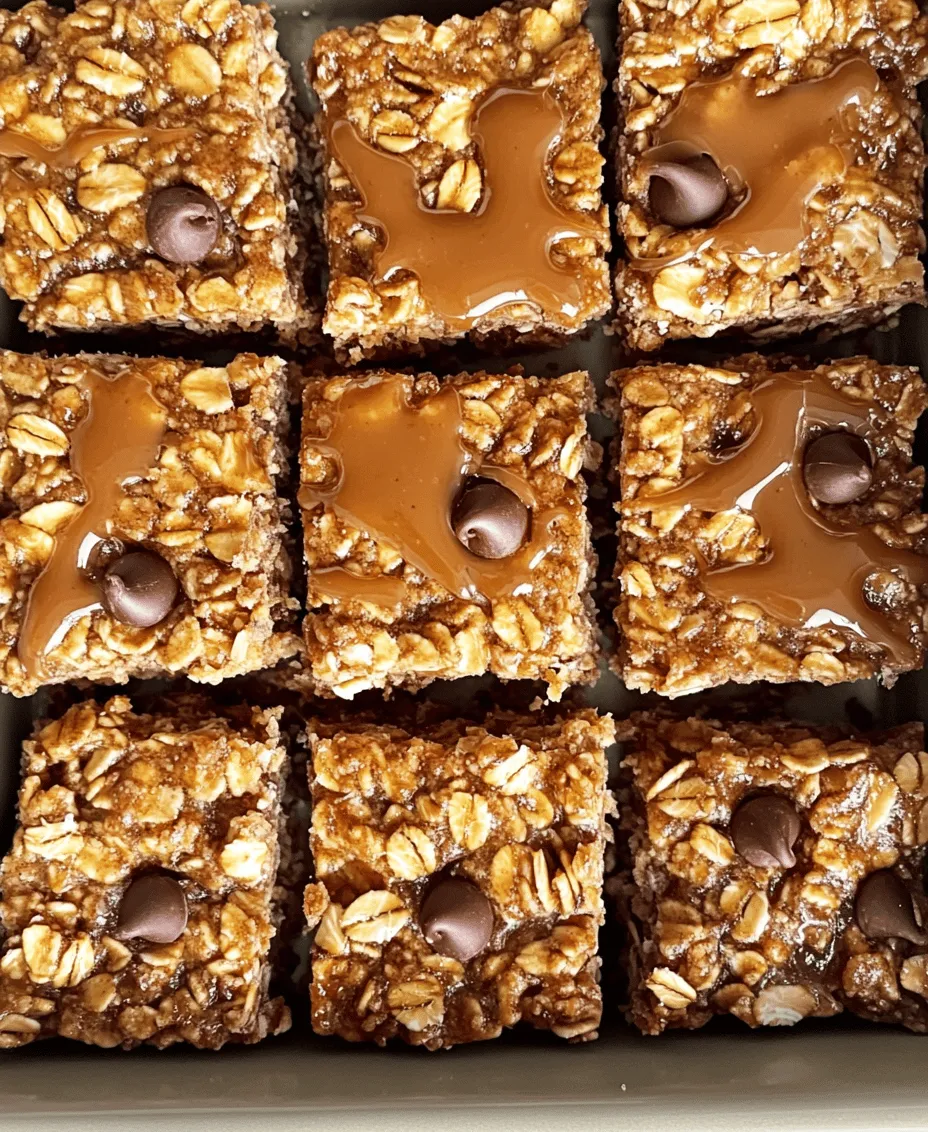
Creative Topping Ideas Post-Baking
After baking, consider drizzling your bars with yogurt, melting dark chocolate for a rich topping, or spreading additional nut butters on top for a decadent finish.
The Importance of Homemade Snacks in a Healthy Diet
Creating your snacks at home offers several important benefits:
Control Over Ingredients and Avoiding Preservatives
When you prepare snacks yourself, you have complete control over what goes into them. This allows you to avoid unhealthy additives, excessive sugar, and artificial ingredients found in many commercial snacks.
How Homemade Snacks Can Fit into Various Dietary Lifestyles
Homemade granola bars can easily be tailored to fit various dietary lifestyles. Whether you are gluten-free, vegan, low-carb, or following another diet, you can modify ingredients to suit your needs.
Encouraging Mindfulness in Snack Choices for Better Health Outcomes
Making your snacks encourages mindfulness about what you consume. Rather than reaching for convenient, processed options, you take the time to prepare something nutritious and wholesome, leading to better health outcomes.
Conclusion: Embracing the Joy of Homemade Granola Bars
In conclusion, making chewy peanut butter granola bars at home is a simple yet fulfilling endeavor. Not only do you have the satisfaction of crafting a delicious snack, but you also gain the versatility to experiment with ingredients and flavors to suit your preferences.
Whether you enjoy them as a pre-workout snack, a quick breakfast, or a midday treat, these granola bars can easily become a staple in your daily routine. Embrace the joy of homemade snacks, and enjoy the health benefits that come with making informed choices for yourself and your family. So roll up your sleeves, gather your ingredients, and start creating your very own chewy peanut butter granola bars today!