Introduction
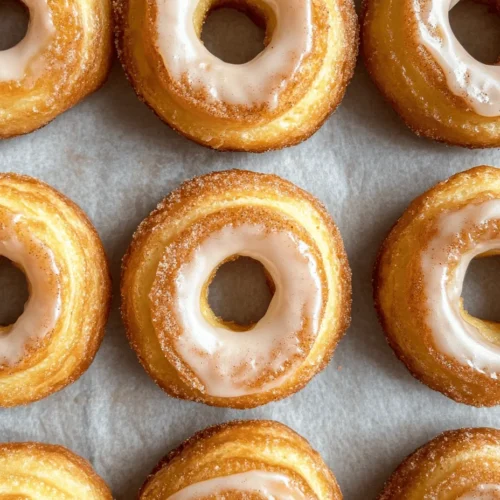
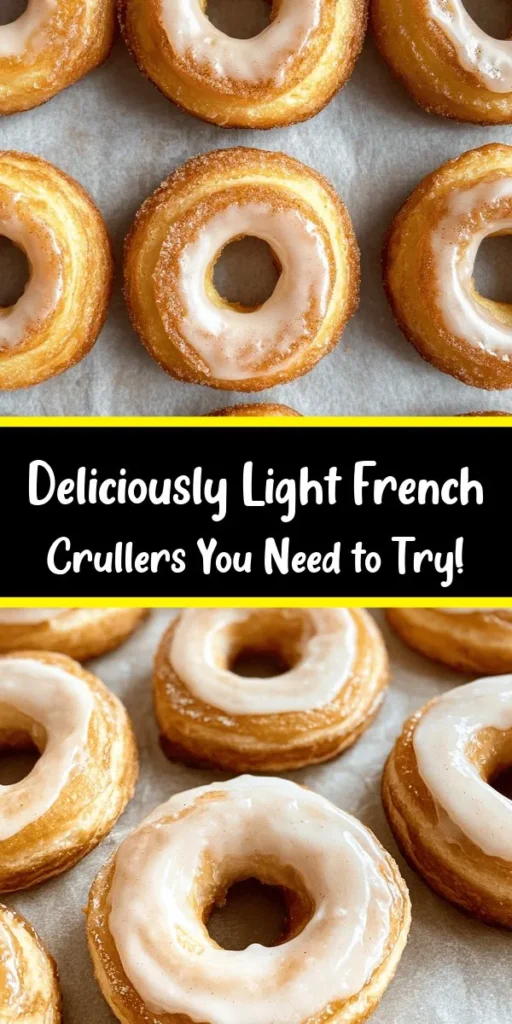
Delicate French Crullers are a beloved pastry choice that brings together a light and airy texture, complemented by a sweet glaze, making them an irresistible treat for breakfast or an afternoon snack. These delightful doughnuts, with their unique shape and enchanting flavor, have captured the hearts of pastry lovers worldwide. Originating from France, crullers are not just a breakfast staple; they are a culinary experience often savored with a steaming cup of coffee or tea.
In this article, we will delve into the rich history of crullers, explore the science behind their perfect texture, and provide a comprehensive step-by-step guide to creating these delectable pastries in the comfort of your own kitchen. Whether you are a seasoned baker or a novice in the culinary world, this recipe will empower you to craft these delightful pastries from scratch, ensuring that you can impress your family and friends with a taste of French patisserie.
Understanding French Crullers
Exploring the Origins of Crullers
Crullers boast a historical significance in French cuisine, where they have been a cherished treat for centuries. The term “cruller” is derived from the Dutch word “krullen,” which means “to curl,” an apt description of the pastry’s twisted shape. Traditionally, crullers were made by frying dough that was enriched with eggs, creating a light, airy texture that is both satisfying and indulgent.
As culinary traditions evolved, crullers made their way across borders, leading to various adaptations around the world. In the United States, for instance, crullers are often referred to as “French crullers,” while other cultures have their unique takes on the shape and flavor. Despite these variations, the essence of the cruller remains the same—a delightful fusion of doughnut charm and pastry elegance.
The Unique Characteristics of French Crullers
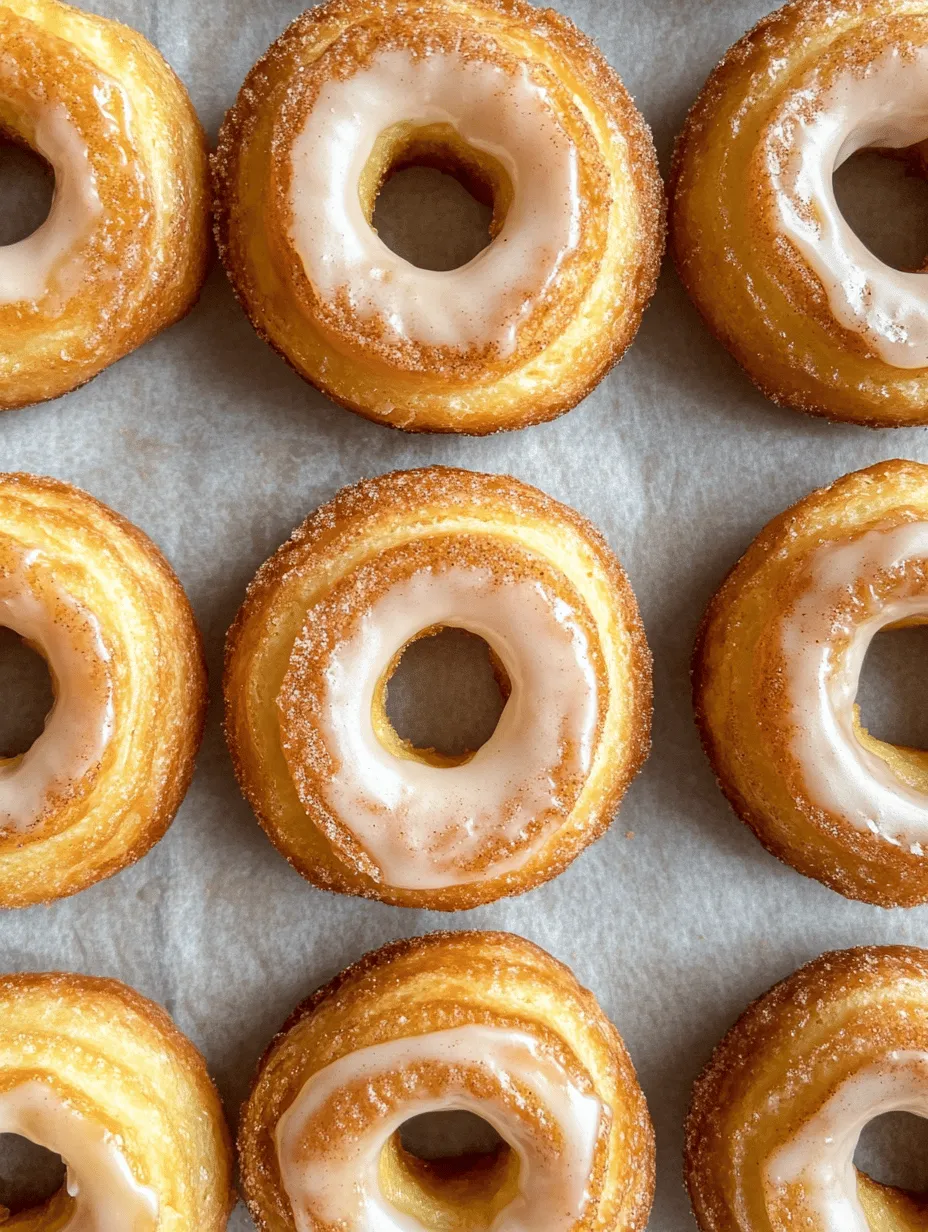
What sets French Crullers apart from other pastries is their exceptional texture and flavor profile. These doughnuts are crafted using the choux pastry technique, which involves cooking the dough before it is baked or fried. This method creates a light and airy interior that contrasts beautifully with the crisp exterior, resulting in a delightful mouthfeel.
The flavor of French Crullers is equally enticing, often enhanced by the addition of vanilla and a hint of cinnamon, which elevate the overall experience. The combination of these ingredients ensures that each bite is a symphony of flavors, with a subtle sweetness that lingers on the palate.
Ingredients Breakdown
To create the perfect French Crullers, it is essential to understand the role of each ingredient in the recipe. Below is a breakdown of the essential components required for crafting these delightful pastries.
Essential Ingredients for Crullers
1. Water, Butter, and Salt: These ingredients form the foundation of the dough. The water is essential for hydrating the flour, while butter adds richness and enhances the flavor. A pinch of salt is crucial for balancing sweetness and elevating the overall taste.
2. Flour: Choosing the right type of flour is vital for achieving the perfect texture. All-purpose flour is commonly used, but some bakers may opt for cake flour to create a lighter, tender cruller. The protein content of the flour will influence the structure and chewiness of the pastry.
3. Eggs: Eggs play a pivotal role in the cruller dough, providing structure and richness. They help create the airy texture characteristic of crullers by trapping steam during cooking, which causes the dough to puff up beautifully.
4. Vanilla and Cinnamon: These flavorings add depth and aroma to the crullers. Pure vanilla extract enhances the sweetness, while a touch of cinnamon provides a warm, comforting note that pairs well with the glaze.
Glazing the Crullers
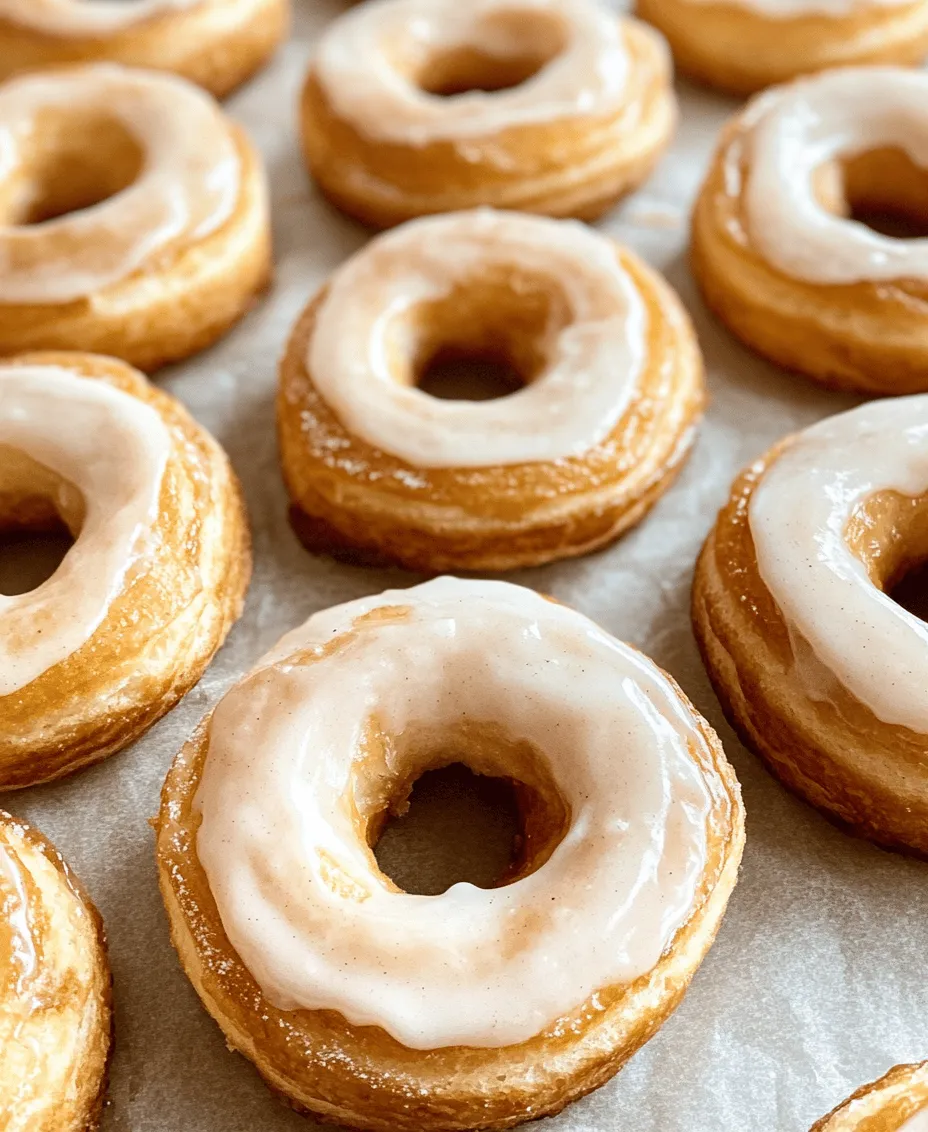
Once the crullers are fried to golden perfection, the next step is to glaze them. The glaze is not just a finishing touch; it elevates the flavor profile and adds a beautiful sheen to the pastries.
1. The Perfect Glaze: A simple mixture of powdered sugar, milk, and vanilla extract creates a smooth, sweet glaze that beautifully complements the crullers. The powdered sugar dissolves easily, ensuring a glossy finish, while the milk adds just the right amount of creaminess.
2. Variations in Glazing: While a classic vanilla glaze is a favorite, there are countless variations you can explore. Consider adding cocoa powder for a chocolate glaze, or infusing your glaze with citrus zest for a refreshing twist. The possibilities are endless, allowing you to customize the flavor of your crullers to suit your taste.
Step-by-Step Instructions
Creating French Crullers involves a few essential steps, each requiring careful attention to detail. Below, we outline the initial stages of preparing the dough, ensuring you are well-equipped to start your cruller-making journey.
Preparing the Dough
Combining the Base Ingredients
To begin, gather your ingredients and prepare your workspace. Start by measuring out the water, butter, and salt in a saucepan. Place the saucepan over medium heat, allowing the butter to melt completely. Once melted, bring the mixture to a rolling boil. This step is crucial, as it activates the flour when added, leading to the desired texture of the cruller dough.
Next, gradually add the flour to the boiling mixture while stirring vigorously with a wooden spoon or spatula. This technique is vital for ensuring that the flour is fully incorporated, preventing lumps from forming. Continue stirring until the dough forms a cohesive ball and pulls away from the sides of the pan. You should see a thin film forming on the bottom of the saucepan, indicating that the dough is ready for the next stage.
Importance of Temperature Control During Cooking
Controlling the temperature throughout the cooking process is essential for achieving the right consistency in your cruller dough. If the mixture is too hot when adding the flour, it can lead to a gloopy texture, while a too-cool mixture can prevent the dough from achieving the desired rise.
Once the dough has reached the right consistency, remove it from the heat and allow it to cool slightly for a few minutes. This cooling period is important before moving on to the next step, as adding eggs to hot dough can result in scrambled eggs rather than a smooth batter.
Incorporating Eggs into the Dough
After the dough has cooled, it’s time to incorporate the eggs. Crack the eggs into a separate bowl and whisk them lightly to break them up. Gradually add the eggs to the dough, mixing vigorously after each addition. The dough will initially appear to separate, but continue mixing until it becomes smooth and glossy.
This step is critical for achieving the light, airy texture that crullers are known for. The eggs not only add moisture but also contribute to the leavening process, allowing the crullers to rise beautifully when fried. Continue adding the eggs until the dough is pipeable but still holds its shape—this is the ideal consistency for cruller dough.
As you prepare to pipe the dough, ensure you have your piping bag fitted with a star tip ready. This will allow you to create the characteristic cruller shape that is both visually appealing and delicious.
With the dough prepared, you are well on your way to creating beautiful, delicate French Crullers that are sure to delight anyone fortunate enough to enjoy them. In the next section, we will cover the frying process and the final steps to finish your crullers with a sweet glaze. Stay tuned for the continuation of this culinary journey!
Techniques for Mixing: Ensuring Smoothness and Glossiness
When it comes to crafting the perfect choux pastry for your French crullers, the mixing technique is crucial. Start by combining water, butter, and salt in a saucepan over medium heat. Stir the mixture until the butter melts completely and the water begins to simmer. This initial step helps to create a smooth base for your pastry.
Once the butter is melted, add the flour all at once, stirring vigorously with a wooden spoon or spatula. It’s important to mix until the dough forms a ball and pulls away from the sides of the pan, which should take about 2-3 minutes. This process helps to cook the flour slightly, ensuring that your crullers have a light and airy texture.
After achieving the dough ball, transfer it to a mixing bowl and allow it to cool for a few minutes. This cooling step is essential because it prevents the eggs from cooking when added. Once the dough is warm but not hot, begin incorporating the eggs. Add the eggs one at a time, mixing thoroughly after each addition until the dough is smooth and glossy. The result should be a thick, pipeable batter that holds its shape.
The Role of Eggs in Choux Pastry
Eggs play a vital role in choux pastry, providing structure, moisture, and richness. The proteins in the eggs help bind the ingredients together and contribute to the rise of the pastry. When heated, the moisture in the eggs turns to steam, causing the dough to puff up. This is what gives crullers their signature lightness and airy texture.
For the best results, use large eggs at room temperature. This ensures they incorporate fully into the dough and create a homogenous mixture. If your batter feels too thick after adding the eggs, you can add a little water or milk to adjust the consistency. The goal is to achieve a batter that is thick enough to hold its shape when piped but still smooth enough to flow easily.
Piping the Crullers
Choosing the Right Piping Tip for the Desired Shape
Piping your crullers is where creativity meets technique. For traditional cruller shapes, a star-shaped piping tip is ideal. The star tip not only creates the beautiful ridges but also helps the crullers to fry evenly. A larger tip, around 1 inch in diameter, will yield thicker crullers, while a smaller tip can create more delicate versions.
Before piping, fill your piping bag with the choux pastry, ensuring no air bubbles are trapped inside. Twist the top of the bag to keep the batter from spilling out. It’s also helpful to secure the piping bag in a tall glass for easy filling.
Tips for Piping: Maintaining Uniformity and Spacing
When piping, aim for uniformity in size to ensure even cooking. Start by piping a swirl onto parchment paper, creating a round shape and then moving to the center to make a smaller circle, forming a ring. This technique allows for a classic cruller look. Spacing is equally important; space your piped crullers about 2 inches apart to allow for expansion during frying.
If you’re unsure about your piping skills, practice on a piece of parchment paper before piping directly onto your frying surface. This will give you a sense of how much pressure to apply and how to control the shape.
Frying Techniques
Best Practices for Heating Oil: Safety Tips and Temperature Checks
Frying your crullers properly is essential for achieving that perfect golden-brown crust. Start by selecting a deep, heavy-bottomed pot or a deep fryer to ensure even heating. Fill it with oil (vegetable or canola oil works best) to a depth of approximately 3 inches.
Heat the oil over medium heat until it reaches about 350°F (175°C). A kitchen thermometer is invaluable here; it helps ensure the oil is at the right temperature. If you don’t have one, drop a small piece of dough into the oil. If it rises to the surface and sizzles, you’re good to go.
Safety is paramount. Never leave hot oil unattended, and keep a lid nearby in case of flare-ups. Additionally, avoid overcrowding the pot; fry in batches if necessary, as too many crullers can lower the oil temperature and result in greasy pastries.
How to Achieve the Perfect Golden Brown Color
Once the oil is ready, gently place the crullers into the hot oil, using a slotted spoon to lower them in slowly. Fry for about 3-4 minutes on each side, or until they turn a beautiful golden brown. Resist the temptation to flip them too early; allow them to form a crust first to maintain their shape.
To achieve an even color, rotate the crullers occasionally. Once they are perfectly golden, remove them with a slotted spoon and place them on a paper towel-lined plate to drain off excess oil. This step is essential for ensuring your crullers are light and not overly greasy.
Draining and Glazing
Techniques for Draining Excess Oil Without Compromising Texture
Properly draining your crullers is critical to maintaining their delightful texture. After frying, let the crullers rest on a plate lined with paper towels. This allows the excess oil to drain off without making the crullers soggy. Avoid stacking them, as this can trap steam and moisture, leading to a loss of crispiness.
For an extra touch, you can place the crullers on a wire rack over a baking sheet. This method allows for better airflow around the pastries, ensuring they stay crisp while cooling.
Ensuring the Glaze Adheres Properly to the Crullers
To glaze your crullers, prepare a simple glaze by whisking together powdered sugar, milk, and a touch of vanilla extract until smooth. Ensure the glaze is not too thick; it should easily coat the back of a spoon.
Once the crullers are slightly cooled but still warm, dip the tops into the glaze, allowing any excess to drip off. For an added touch, you can sprinkle chopped nuts, coconut flakes, or colorful sprinkles while the glaze is still wet. This makes for a visually appealing presentation that elevates your homemade crullers.
Serving Suggestions
Pairing Crullers with Beverages
French crullers are delightful on their own, but they pair beautifully with a variety of beverages. A rich, aromatic coffee, such as an espresso or cappuccino, complements the sweet, airy texture of the crullers. The slight bitterness of the coffee balances the sweetness of the glaze, making for a perfect breakfast or snack option.
For tea lovers, consider pairing crullers with a classic Earl Grey or a robust black tea. The citrus notes in the Earl Grey enhance the flavors of the pastry, while a strong black tea provides a lovely contrast.
Creative Serving Ideas: Adding Fruit or Other Toppings
To elevate your crullers even further, consider serving them with fresh fruit or additional toppings. Fresh berries, such as raspberries or strawberries, can add a burst of color and tartness that complements the sweet glaze. Alternatively, a dollop of whipped cream or a scoop of ice cream can turn your crullers into a decadent dessert.
For a French twist, serve your crullers with a side of crème fraîche or a fruit compote. These additions not only enhance the flavor profile but also create a visually appealing plate that is sure to impress your guests.
Storing and Reheating Crullers
Tips for Keeping Crullers Fresh
If you happen to have leftover crullers, store them in an airtight container at room temperature. To maintain their texture, avoid refrigerating them, as this can cause them to become stale. Properly stored, crullers can last for up to two days without significant loss of quality.
For longer storage, consider freezing them. Wrap each cruller individually in plastic wrap and place them in a freezer-safe bag. When ready to enjoy, simply thaw at room temperature before reheating.
Recommended Reheating Methods for Optimal Texture
Reheating crullers can be a delicate process to ensure they retain their original texture. The best method is to use an oven or toaster oven. Preheat the oven to 350°F (175°C) and place the crullers directly on the rack for about 5-7 minutes, or until warmed through. This method helps to restore some of the crispiness lost during storage.
Avoid using the microwave to reheat crullers, as it can make them chewy and rubbery. If you want to refresh the glaze, consider dipping them in a fresh batch before serving.
Nutritional Information
Understanding the Nutritional Content
While indulging in French crullers is a delightful experience, it’s important to be aware of their nutritional content. On average, a single cruller contains approximately 150-200 calories, depending on the size and amount of glaze used. They typically have about 7-10 grams of fat, 20-25 grams of carbohydrates, and 1-2 grams of protein.
Health Considerations: Enjoying in Moderation
As with any sweet treat, moderation is key. Enjoying crullers as an occasional indulgence is perfectly acceptable, especially when balanced with a healthy diet and active lifestyle. Consider savoring one or two crullers paired with a nutritious beverage for a satisfying breakfast or snack.
Conclusion
Creating delicate French crullers at home is a rewarding endeavor that brings a taste of French pastry culture to your kitchen. With a few simple ingredients and some careful techniques, you can enjoy these airy, sweet treats any time you desire. Whether you’re sharing them with friends or indulging in a personal treat, homemade crullers are sure to impress. Embrace the art of pastry making and savor the delightful experience of crafting your own batch of crullers, bringing joy and flavor to your day.