
Introduction
If you’ve ever savored a spoonful of sweet, homemade jam spread over warm, buttery toast, you know the joy it brings. Today, we invite you to embark on a culinary adventure with our Sweet & Tangy Blackberry Bliss Jam recipe. This delightful spread captures the very essence of summer, bringing together the vibrant flavors of fresh blackberries, the sweetness of sugar, and a zesty hint of lemon juice.
Making your own jam is not only a rewarding experience but also a chance to create something special that can be enjoyed at breakfast, as a snack, or even gifted to friends and family. The satisfaction of transforming simple ingredients into a jar of bliss is unparalleled. In this article, we will guide you step-by-step through the process of creating this delicious blackberry jam, share insights on the ingredients that make it unique, and provide you with tips and techniques to ensure your jam turns out perfect every time.
Understanding the Ingredients
Before we dive into the jam-making process, it’s important to understand the ingredients that contribute to the rich flavor and delightful texture of our Blackberry Bliss Jam. Each component plays a crucial role, ensuring that your jam not only tastes amazing but also has a desirable consistency and shelf life.
Fresh Blackberries
Blackberries are the star of our jam, and for a good reason. These plump, juicy berries are not only delicious but also packed with nutrients. Rich in vitamins C and K, fiber, and antioxidants, blackberries offer numerous health benefits, including boosting your immune system and promoting healthy digestion.
When selecting blackberries for your jam, look for berries that are plump, firm, and deeply colored. Avoid those that are mushy or have any signs of mold. Fresh blackberries are usually available during the summer months, making it easy to find local varieties at farmers’ markets or grocery stores. To prepare the berries for your jam, rinse them gently under cool water and remove any stems or leaves. Mashing the berries will release their juices, which is essential for creating a flavorful jam.
Granulated Sugar
Sugar is a key ingredient in jam-making, serving multiple purposes. Not only does it add sweetness to balance the tartness of the blackberries, but it also acts as a preservative. Sugar helps to inhibit the growth of bacteria and mold, allowing your jam to have a longer shelf life.
In our recipe, granulated sugar will be used in a specific ratio to ensure the right level of sweetness and proper gel formation. It’s essential to measure your sugar accurately, as too little sugar can result in runny jam, while too much can create a overly sweet product.
Lemon Juice
Lemon juice adds a delightful acidity to our jam, enhancing its flavor profile and helping to balance the sweetness of the sugar. The acidity from lemon juice is also crucial in the jam-making process, as it helps to set the pectin, which thickens the jam.
Using fresh lemon juice will yield the best results, so be sure to squeeze a fresh lemon for this recipe. The vibrant citrus notes will elevate the overall taste of your blackberry jam, making it even more enjoyable.
Fruit Pectin
Fruit pectin is a natural thickening agent derived from fruits, and it plays a vital role in the jam-making process. Pectin helps to create that desirable gel-like consistency we all love in jams and jellies. When combined with sugar and acid, pectin forms a gel, trapping the fruit juices and creating a thick, spreadable product.
There are two main types of pectin available for home canning: liquid and powdered. Both types work well, but they may require different cooking times and sugar ratios. Make sure to follow the instructions on the packaging to achieve the best results.
Salt
While it may seem like a small addition, salt plays an important role in enhancing the flavors of your jam. A pinch of salt can help to balance sweetness and round out the overall taste. Additionally, salt contributes to the preservation process, helping to inhibit the growth of unwanted bacteria.
Now that we’ve explored the essential ingredients that make up our Sweet & Tangy Blackberry Bliss Jam, let’s move on to the step-by-step guide for creating this delightful spread.
Step-by-Step Guide to Making Blackberry Bliss Jam
Making blackberry jam can be an enjoyable and straightforward process, especially when you have a clear plan in place. Here, we will break down each step to guide you through the journey of creating your homemade Blackberry Bliss Jam.
Preparing the Berries
The first step in making blackberry jam is preparing the berries. Start by measuring out the amount of fresh blackberries you need for your recipe. A common ratio is about four cups of blackberries for every batch of jam, but feel free to adjust this based on your preferences or the availability of berries.
Once you have your blackberries, rinse them gently under cool running water to remove any dirt or debris. It’s important to be gentle, as blackberries are delicate and can easily become squished. After rinsing, remove any stems or leaves, and place the clean berries in a large mixing bowl.
Next, mash the blackberries to break them down and release their juices. You can use a potato masher, fork, or even a food processor, depending on the desired consistency. For a chunkier jam, mash just enough to break the berries apart while leaving some larger pieces intact. If you prefer a smoother texture, mash the berries until they are mostly pureed. This step is crucial since the consistency of the mashed berries will affect the final texture of your jam.
Combining Ingredients
Once your blackberries are prepared and mashed to your liking, it’s time to combine the ingredients. In a large saucepan, add your mashed blackberries, the measured sugar, lemon juice, and the appropriate amount of fruit pectin based on the type you’re using. Stir the mixture gently to ensure that all the ingredients are evenly distributed.
It’s essential to follow the recommended ratios of sugar and pectin for successful gel formation. For example, if you are using powdered pectin, it typically requires a specific amount of sugar to activate properly. Make sure to read the instructions on the pectin packaging for guidance.
As you mix, you’ll notice the vibrant purple color of the blackberries will deepen and become more pronounced. This is a sign that the natural juices are being released and thoroughly combined with the sugar and lemon juice.
Cooking the Jam
Now comes the exciting part: cooking the jam. Place your saucepan over medium heat and bring the mixture to a gentle boil. It’s crucial to stir constantly during this stage to prevent the jam from sticking to the bottom of the pan and burning.
Once the mixture reaches a rolling boil — one that cannot be stirred down — maintain the heat and let it cook for about 10-15 minutes. This is where the magic happens as the sugars dissolve and the pectin begins to work its thickening magic. You’ll want to watch for the jam to reach its desired consistency, which can be checked using the wrinkle test or a jam thermometer.
Stirring continuously during this process not only helps prevent burning but also ensures that the heat is evenly distributed throughout the mixture. Keep a close eye on the jam, as it can quickly transition from undercooked to overcooked. The goal is to achieve a thick, spreadable texture while maintaining the vibrant flavor of the blackberries.
Testing for Doneness
To ensure your blackberry jam has reached the perfect consistency, it’s essential to perform a doneness test. There are a couple of methods you can use to check if your jam is ready for canning.
One popular method is the wrinkle test. To perform this test, place a small plate in the freezer before you start cooking the jam. After about 10-15 minutes of boiling, remove the plate from the freezer and drop a small spoonful of jam onto it. Let it sit for a minute, then run your finger through the jam. If it wrinkles and holds its shape, your jam is ready to be canned. If it is still too runny, continue cooking and repeat the test every few minutes.
Another option is to use a candy or jam thermometer. For traditional jam, the mixture should reach a temperature of around 220°F (104°C) at sea level. Keep in mind that altitude can affect this temperature, so if you’re at a higher elevation, you may need to adjust accordingly.
Once your jam has passed the doneness test, it’s time to prepare it for canning.
In this first part of our recipe article, we’ve explored the delightful world of making Sweet & Tangy Blackberry Bliss Jam, from understanding the key ingredients to the essential steps involved in the jam-making process. Stay tuned for the next part, where we will dive into the canning procedure, storage tips, and creative ways to use this delicious homemade jam in your daily life.

The Plate Test: Ensuring Your Jam Sets Perfectly
One of the most crucial steps in making Sweet & Tangy Blackberry Bliss Jam is ensuring that it sets correctly. The plate test is a simple yet effective method to determine if your jam is ready for jarring. To perform this test, you will need a small plate and a spoon.
1. Chill the Plate: Start by placing a plate in the freezer for about 5 to 10 minutes. This will cool the plate down, making it easier to assess the consistency of your jam.
2. Spoon the Jam: Once the plate is chilled, take a spoonful of your bubbling jam and drop it onto the cold plate.
3. Tilt the Plate: Allow the jam to sit for a minute, then tilt the plate slightly. If the jam holds its shape and doesn’t run, you’re good to go! If it’s still too runny, continue cooking the jam and test again after a few more minutes.
Alternative Methods for Testing Jam Consistency
While the plate test is a reliable method, there are alternatives you can use to ensure your jam sets well:
– Cold Spoon Test: Similar to the plate test, this involves chilling a metal spoon in the freezer. Dip the spoon into the jam and allow it to cool slightly. If it coats the back of the spoon and holds its shape when you run your finger through it, your jam is ready.
– Filling a Jar: If you’ve already filled a jar with jam, you can also test it by allowing it to sit for a few minutes. If the jam settles and forms a thicker layer on top, it’s an indicator that it will set nicely once processed.
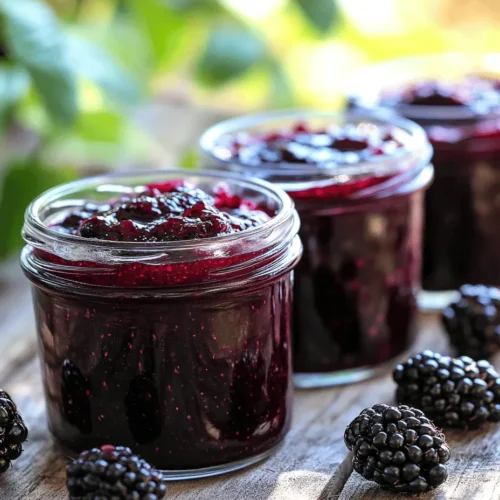
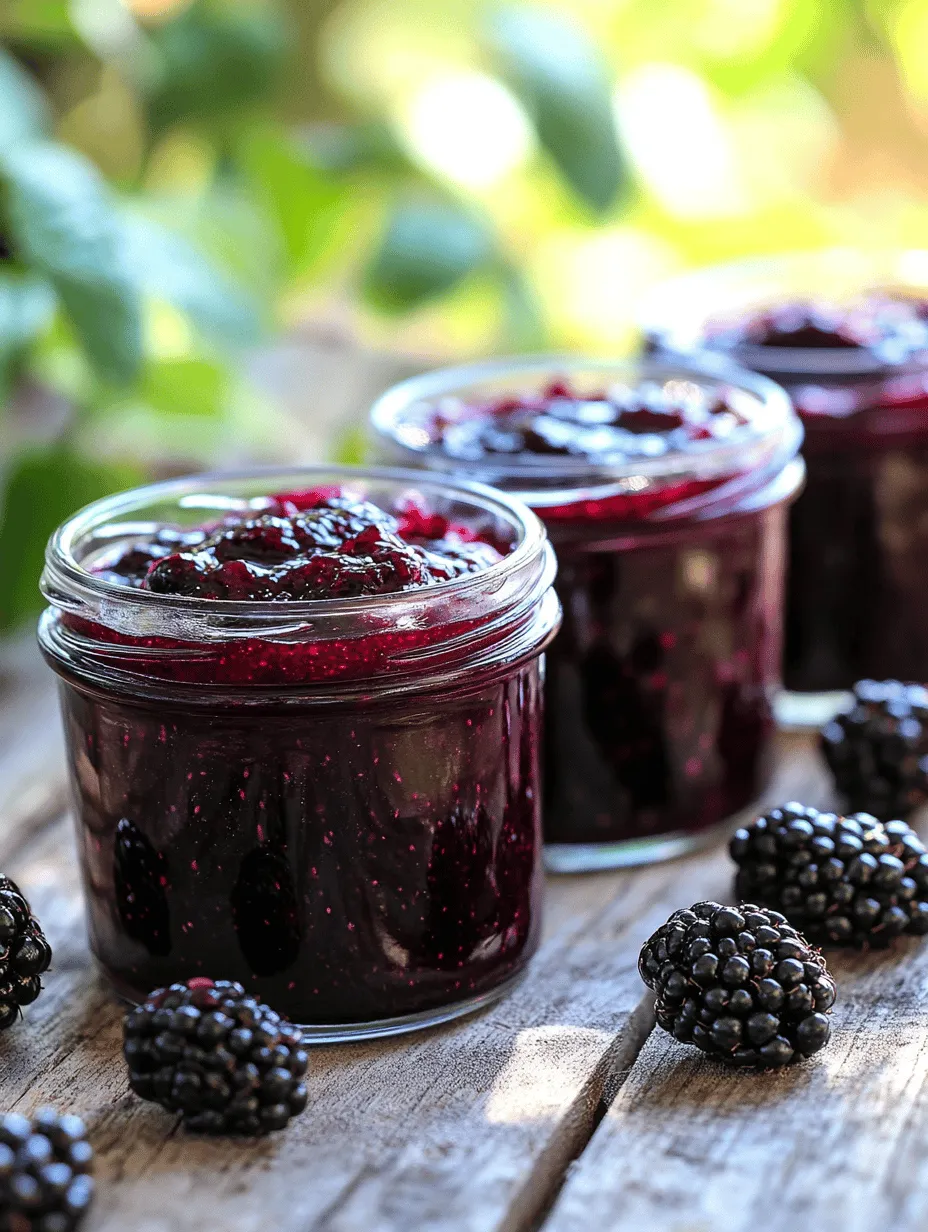
Jarring the Jam
Once you’ve confirmed that your Sweet & Tangy Blackberry Bliss Jam has reached the correct consistency, it’s time to jar it up. Proper jarring is essential for the preservation of your jam.
1. Prepare Your Jars: Start by washing your jars and lids in soapy water, rinsing thoroughly. To ensure they are sanitized, you can place them in a hot water bath for 10 minutes or run them through the dishwasher on a hot cycle.
2. Fill the Jars: Using a ladle, carefully fill each jar with the jam, leaving about 1/4 inch of headspace at the top. This space is crucial, as it allows for the expansion of the jam during the canning process.
3. Clean the Jar Rim: Wipe the rims of the jars with a clean, damp cloth to remove any residue. This ensures a proper seal when the lids are applied.
4. Seal the Jars: Place the lids on each jar, ensuring they are fitted snugly but not overtightened. The heat from the canning process will help create a vacuum seal.
Processing for Preservation
To ensure your homemade blackberry jam is safe for long-term storage, you will need to process it using the water bath canning method.
1. Prepare the Water Bath: Fill a large pot with water and bring it to a gentle boil. The pot should be deep enough to allow the water to cover the jars by at least an inch.
2. Process the Jars: Once the water is boiling, carefully lower your filled jars into the pot using a jar lifter. Ensure that the jars are upright and not touching each other, which can prevent the heat from circulating properly.
3. Boil: Cover the pot and process the jars in boiling water for about 5 to 10 minutes. The processing time may vary based on your altitude; check canning guidelines for adjustments.
4. Remove and Cool: After processing, carefully remove the jars from the water bath and place them on a clean kitchen towel or cooling rack. Allow them to cool completely, which may take several hours.
5. Check the Seal: Once cool, check the seals by pressing the center of each lid. If it doesn’t pop back, your jar is sealed correctly. Store any jars that haven’t sealed in the refrigerator and use them within a few weeks.
Storing and Enjoying Your Jam
After successfully jarring your Sweet & Tangy Blackberry Bliss Jam, proper storage is key to maintaining its quality.
– Sealed Jars: Store sealed jars in a cool, dark place, such as a pantry or cupboard. Properly sealed jam can last up to a year.
– Unsealed Jars: If any jars did not seal properly, refrigerate them immediately. Unsealed jars should be consumed within 2 to 3 weeks.
– Shelf Life: Once opened, your jam should be refrigerated and used within 2 to 3 months for the best flavor and quality.
The Benefits of Homemade Jam
Making your own jam at home offers numerous advantages that make the effort worthwhile.
Control Over Ingredients
One of the biggest benefits of homemade jam is the control you have over what goes into it. Unlike many store-bought options that contain preservatives, artificial flavors, and excessive sugar, you can tailor your jam to be as pure and natural as you desire. This is especially important for those with dietary restrictions or preferences, as you can choose organic ingredients and avoid allergens.
Freshness and Flavor
Homemade jams often taste superior to commercial varieties. When you make jam from fresh, ripe blackberries, you capture their peak flavor and aroma. Store-bought jams can sometimes taste overly sweet or artificial, lacking the depth and richness that comes from using seasonal, high-quality ingredients. With homemade jam, you can truly savor the essence of summer in every spoonful.
Cost-Effectiveness
Making jam at home can also be more economical than purchasing high-quality jams from the store. While the initial investment in fruit and supplies may seem high, the cost per jar is often significantly lower, especially when using seasonal fruit. Additionally, you have the opportunity to experiment with unique flavors that may not be available commercially, giving you endless possibilities for creativity.
Creative Uses for Blackberry Bliss Jam
Blackberry Bliss Jam is a versatile addition to your culinary repertoire. Here are some delightful ways to enjoy your homemade jam:
Breakfast Delights
Start your day with a burst of berry flavor by incorporating your blackberry jam into breakfast dishes. Spread it on warm toast or bagels, swirl it into yogurt, or drizzle it over pancakes or waffles for a sweet touch. You can also mix it into oatmeal for a delicious and nutritious breakfast.
Baking Inspiration
Blackberry jam can be an excellent ingredient in various baked goods. Use it as a filling for pastries, thumbprint cookies, or layer it in cakes for added moisture and flavor. Consider making a blackberry swirl cheesecake or using it as a topping for a homemade tart for an elegant dessert.
Savory Pairings
Don’t limit your blackberry jam to sweet dishes! It pairs beautifully with savory ingredients, creating a delightful contrast. Spread it on a cheese board alongside creamy cheeses, or use it as a glaze for roasted meats. It can also complement sauces, adding depth and a hint of sweetness to savory dishes.
Conclusion
Making your own Sweet & Tangy Blackberry Bliss Jam is not only a rewarding culinary experience but also a way to savor the flavors of summer all year round. With simple ingredients and straightforward steps, anyone can create a delicious homemade jam that not only enhances meals but also nourishes the soul. Enjoy the satisfaction of spreading your crafted jam on your favorite foods, and share the joy with friends and family. Whether you use it in breakfast dishes, baking, or savory pairings, your homemade jam is sure to delight anyone who tastes it.