
Introduction
Katsu bowls have become a cherished staple in Japanese cuisine, captivating food lovers around the world with their delightful combination of textures and flavors. At the heart of this beloved dish lies the crispy katsu, traditionally made from breaded and fried pork cutlets, paired with a rich and tangy tonkatsu sauce, all served over a bed of perfectly sticky rice and accompanied by vibrant, fresh vegetables.
The beauty of crafting katsu bowls at home is not just in the delicious outcome but also in the satisfaction of mastering the art of frying and sauce-making. The contrast between the crunchy exterior of the katsu, the smoothness of the sauce, and the soft rice creates a culinary experience that is both comforting and exciting. Whether you are a seasoned cook or a beginner in the kitchen, this recipe will guide you through each step to ensure your katsu bowls turn out perfectly every time.
Understanding Katsu and Its Origins
Katsu, short for “katsuretsu,” is a Japanese term that means “cutlet,” and it typically refers to meat that has been breaded and deep-fried. This dish has its roots in the late 19th century when Western cuisine began to permeate Japanese culinary practices. The introduction of breading and frying techniques became popular among the Japanese, leading to the creation of katsu as we know it today. Traditionally, katsu is made using pork, but variations using chicken or even tofu have emerged to cater to diverse palates.
Over the years, katsu has evolved, becoming a staple in bento boxes and a popular choice in casual dining. Its versatility allows for numerous adaptations, including the delicious katsu bowl, which elevates the dish by adding a variety of fresh toppings and a hearty serving of rice.
A key component of katsu is the tonkatsu sauce, a savory, slightly sweet sauce that elevates the flavor profile of the dish. This sauce typically combines a mix of ingredients such as ketchup, soy sauce, and Worcestershire sauce, providing a rich umami flavor that complements the crispy katsu. The combination of the crunchy cutlet and the smooth, tangy sauce is what makes katsu bowls not just a meal, but an experience that delights the senses.
Ingredients Breakdown for Katsu Bowls
To recreate this delightful katsu bowl at home, you will need to gather a variety of ingredients, each playing a crucial role in achieving the perfect flavor and texture. Below is a detailed look at the necessary components, starting with the homemade tonkatsu sauce.
Ingredients for Tonkatsu Sauce
1. Ketchup: The base of the tonkatsu sauce, providing sweetness and a rich tomato flavor.
2. Soy Sauce: Adds depth and umami, enhancing the overall taste of the sauce.
3. Worcestershire Sauce: Contributes a complex flavor profile with its tangy and slightly sweet notes.
4. Mirin: A sweet rice wine that adds a subtle sweetness and a hint of acidity.
5. Dijon Mustard: Provides a slight kick and enhances the sauce’s flavor complexity.
6. Sugar: Balances the acidity from the other ingredients, creating a harmonious taste.
7. Ground Ginger: Offers a warm, spicy note that complements the sauce’s sweetness.
8. Garlic Powder: Adds depth and enhances the overall flavor profile of the sauce.
Ingredients for Katsu
1. Pork Chops: The star of the dish, bone-in or boneless pork chops work well. The meat should be tender and juicy to ensure a satisfying bite.
2. Seasoning: A simple blend of salt and pepper is essential for seasoning the pork before breading to enhance its natural flavor.
3. Flour: Used for dredging the pork, it helps the egg and breadcrumbs adhere better, resulting in a crispier katsu.
4. Eggs: Beaten eggs act as a binding agent, helping the breadcrumbs stick to the pork.
5. Panko Breadcrumbs: The key to achieving that signature crunch, panko breadcrumbs are coarser than regular breadcrumbs, ensuring a light and airy texture when fried.
6. Vegetable Oil: Used for frying the katsu, it should have a high smoke point to achieve a golden-brown crust without burning.
Bowl Components
1. Sticky Japanese Rice: A fundamental element of the katsu bowl, this short-grain rice is sticky and slightly sweet, complementing the fried katsu perfectly.
2. Shredded Cabbage: Adds a refreshing crunch and balances the richness of the katsu.
3. Carrots: Thinly sliced or julienned carrots provide a sweet and colorful touch to the dish.
4. Green Onions: Sliced green onions offer a fresh, mild onion flavor that enhances the overall taste.
5. Pickled Ginger: A traditional accompaniment that adds a tangy and refreshing contrast to the savory katsu.
6. Sesame Seeds: Toasted sesame seeds can be sprinkled on top for added flavor and a nutty crunch.
Step-by-Step Guide to Making Crunchy Katsu Bowls
Preparation of the Tonkatsu Sauce
The first step in creating your crunchy katsu bowl is to prepare the homemade tonkatsu sauce. This sauce is a crucial element that ties the dish together, and making it from scratch ensures fresh flavors and a touch of personalization in your recipe. Here’s how to do it:
1. Gather the Ingredients: Start by measuring out all the ingredients needed for the tonkatsu sauce. This includes ketchup, soy sauce, Worcestershire sauce, mirin, Dijon mustard, sugar, ground ginger, and garlic powder.
2. Combine Ingredients: In a medium-sized bowl, combine all the measured ingredients. Whisk them together until they are well blended and the sugar has dissolved.
3. Adjust Consistency: If the sauce is too thick for your liking, you can add a splash of water or more mirin to achieve a smoother consistency.
4. Taste and Adjust: Give the sauce a taste and adjust the ingredients if necessary. If you prefer a sweeter sauce, add a bit more sugar; for a tangier flavor, consider adding more Worcestershire sauce or mustard.
5. Set Aside: Once you’re satisfied with the flavor, set the tonkatsu sauce aside to allow the flavors to meld while you prepare the katsu.
Preparing the Katsu
With the tonkatsu sauce ready, it’s time to prepare the katsu itself. This process involves seasoning, breading, and frying the pork chops to create that signature crunchy texture.
1. Prepare the Pork Chops: Start by trimming any excess fat from the pork chops. Use a meat mallet to pound the pork chops to an even thickness, which helps with even cooking and tenderness. Season both sides generously with salt and pepper.
2. Set Up Breading Station: Create a breading station with three shallow dishes: one with flour, one with beaten eggs, and the last with panko breadcrumbs.
3. Bread the Pork Chops:
– Dredge each seasoned pork chop in the flour, ensuring it is well-coated. Shake off any excess flour.
– Dip the floured pork chop into the beaten eggs, allowing any excess to drip off.
– Finally, coat the pork chop in panko breadcrumbs, pressing gently to ensure the breadcrumbs adhere well. Repeat this process for all the pork chops.
4. Fry the Katsu:
– In a large skillet or frying pan, pour enough vegetable oil to cover the bottom of the pan by about half an inch. Heat the oil over medium-high heat until it reaches approximately 350°F (175°C).
– Carefully place the breaded pork chops into the hot oil, cooking them in batches if necessary to avoid overcrowding. Fry each side for about 3-4 minutes or until golden brown and crispy.
– Once cooked, transfer the katsu to a paper towel-lined plate to drain excess oil.
5. Slice the Katsu: After allowing the katsu to rest for a few moments, slice the pork chops into strips for serving. The crispy exterior should yield to the tender meat inside, showcasing the perfect katsu texture.
As you prepare the katsu and tonkatsu sauce, the enticing aromas will fill your kitchen, setting the stage for a delicious meal that is sure to impress family and friends alike. In the next part of this article, we will dive into the final assembly of the katsu bowls, combining all components for a visually stunning and mouthwatering dish.
Instructions on Seasoning and Breading the Pork Chops
To create the perfect Crunchy Katsu Bowls, start with the pork chops. The seasoning is crucial as it infuses the meat with flavor. Begin by patting the pork chops dry with paper towels. This step is essential as it helps the seasoning adhere better and prevents excess moisture during frying.
Seasoning the Pork:
– Salt and Pepper: Generously season both sides of the pork chops with salt and freshly ground black pepper. Use about 1 teaspoon of salt and ½ teaspoon of pepper for each chop.
– Optional Marinade: If you want to take the flavor up a notch, consider marinating the pork chops in a mixture of soy sauce and garlic for 15-30 minutes before seasoning. This adds an umami depth to the dish.
Breading Process:
1. Prepare the Breading Station: Set up three shallow bowls: one with all-purpose flour, the second with beaten eggs, and the third with panko breadcrumbs.
2. Coating the Pork:
– Flour First: Dredge each pork chop in flour, ensuring it’s evenly coated. Shake off any excess flour.
– Dip in Egg: Next, dip the floured chop into the beaten eggs, allowing the excess to drip off.
– Final Panko Coating: Finally, coat the chop with panko breadcrumbs, pressing gently to ensure an even coating. This is key for that signature crunch.
Tips for Even Coating:
– Use one hand for the dry ingredients (flour and breadcrumbs) and the other for the wet (egg) to avoid clumping.
– Ensure that all sides of the pork chop are well-coated, and feel free to double-dip in the egg and panko for an extra crispy texture.
Frying the Katsu
Frying is where the magic happens, transforming your breaded pork into a deliciously crispy katsu.
Essential Frying Techniques:
1. Choosing the Right Oil: Use a neutral oil with a high smoke point like vegetable, canola, or peanut oil for frying. This ensures a crispy texture without imparting unwanted flavors.
2. Heating the Oil: In a large frying pan or skillet, pour enough oil to cover the bottom by about ½ inch. Heat the oil over medium-high heat until it reaches around 350°F (175°C). You can test the oil by dropping a small piece of bread into it; if it sizzles and bubbles, it’s ready.
3. Frying Time: Carefully place the breaded pork chops into the hot oil, cooking in batches if necessary to avoid overcrowding. Fry for about 3-4 minutes on each side or until golden brown and cooked through. An instant-read thermometer should read 145°F (63°C) when done.
4. Drain Excess Oil: Once cooked, remove the katsu from the oil and place it on a wire rack or a plate lined with paper towels to absorb excess oil.
Discussion of Oil Temperature and Frying Time: Maintaining the correct oil temperature is crucial. If the oil is too cool, the katsu will absorb more oil and become greasy. If it’s too hot, the outside will brown too quickly while the inside remains undercooked. Use a kitchen thermometer for accuracy.
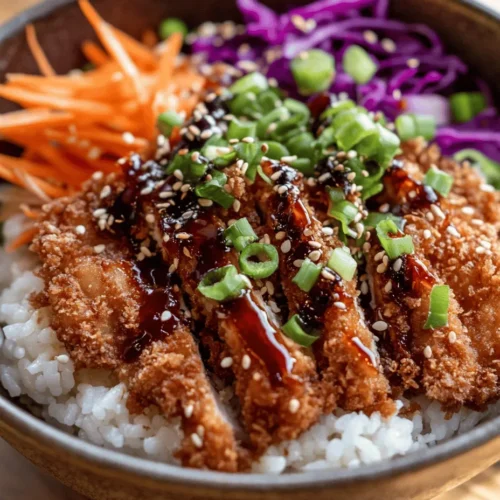
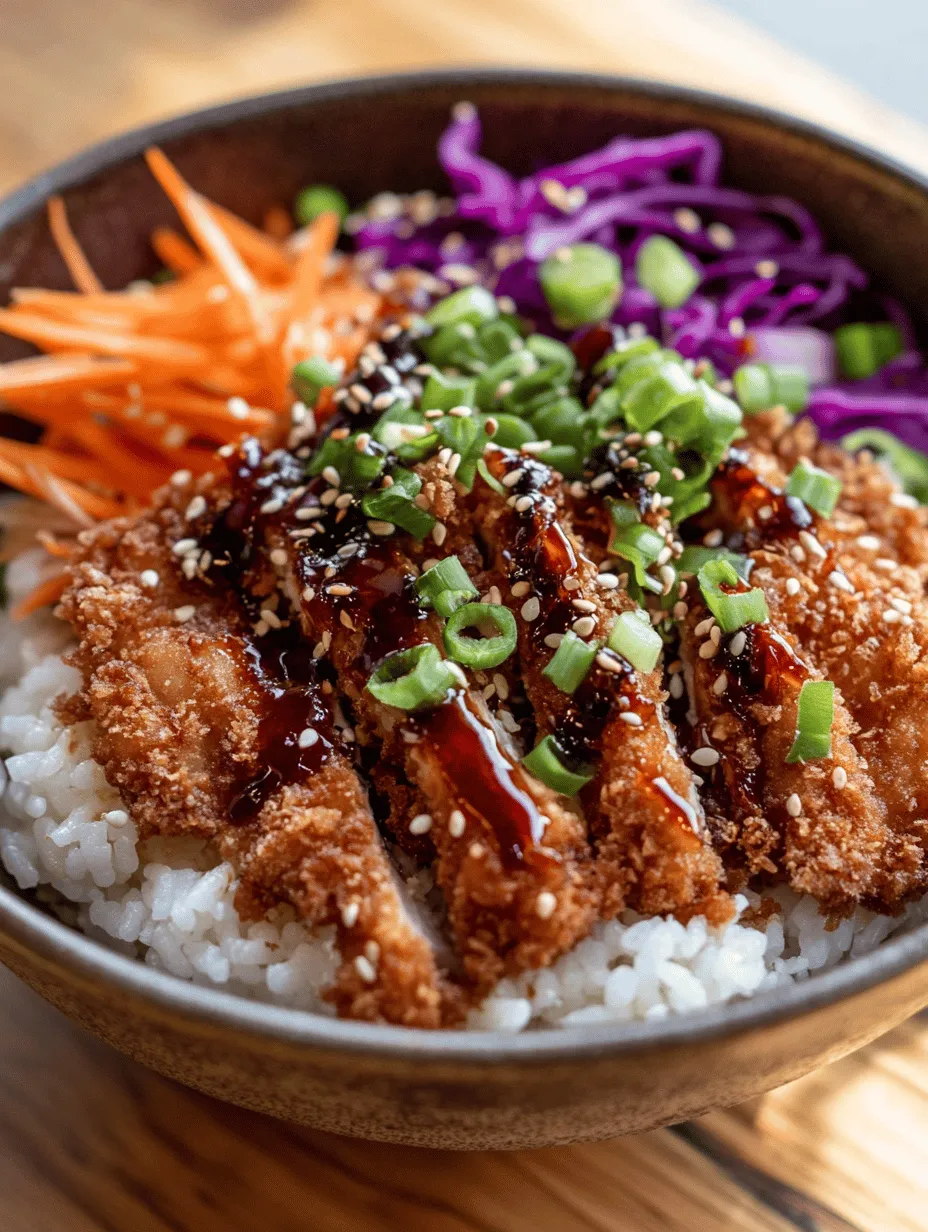
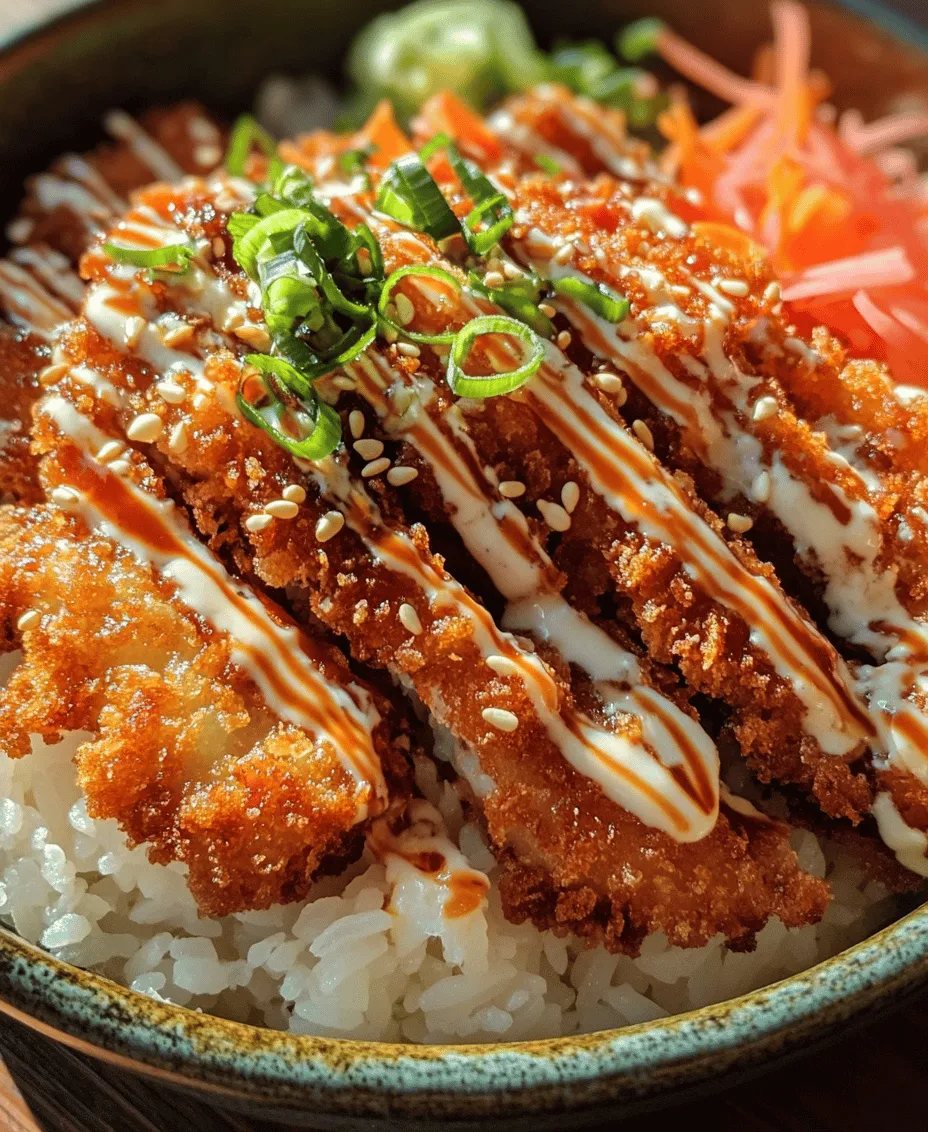
Assembling the Katsu Bowl
Once your katsu is perfectly fried, it’s time to assemble your bowl for a visually appealing and delicious meal.
Step-by-Step Assembly:
1. Base Layer: Start with a scoop of steamed rice at the bottom of your bowl—white or brown rice works well. Aim for about a cup per serving.
2. Adding Katsu: Slice the fried pork katsu into strips and arrange them neatly over the rice. This not only looks great but also allows the rice to soak up the flavors from the katsu.
3. Vegetable Layer: Add a handful of shredded cabbage or mixed greens beside the katsu for crunch and freshness. This contrasts nicely with the warm katsu.
4. Sauce It Up: Drizzle a generous amount of homemade tonkatsu sauce over the meat. Don’t be shy—this sauce is packed with flavor.
5. Finishing Touches: For garnish, sprinkle chopped green onions, sesame seeds, and add a few slices of pickled ginger on the side. These elements add vibrant color and enhance the flavor profile.
Tips for Layering Ingredients:
– Use contrasting colors to make the bowl visually appealing—green from the vegetables, golden-brown from the katsu, and white from the rice.
– Consider adding a soft-boiled egg on top, which adds richness and makes the dish even more satisfying.
Serving Suggestions and Pairings
To complement your Crunchy Katsu Bowl, consider the following side dishes and drink pairings:
Side Dishes:
– Miso Soup: A traditional Japanese soup made with dashi, miso paste, and tofu. It’s a light, comforting addition that balances the richness of the katsu.
– Pickled Vegetables: Japanese pickles (tsukemono) provide a crunchy, tangy contrast that enhances the meal. You can easily find these in Asian grocery stores or make your own.
– Steamed Edamame: A simple side of steamed edamame sprinkled with sea salt adds a fresh element that complements the main dish.
Beverage Pairings:
– Green Tea: A classic choice that cleanses the palate and pairs beautifully with the savory flavors of the katsu.
– Japanese Beer: A light beer such as Asahi or Sapporo can enhance the meal experience, providing a refreshing contrast to the fried katsu.
– Sake: For a more authentic touch, serve a chilled or warm sake alongside your katsu bowl.
Nutritional Information and Health Considerations
While the Crunchy Katsu Bowl is undeniably delicious, it’s essential to consider its nutritional components.
Overview of Nutritional Components:
– Protein: The pork katsu is an excellent source of protein, which is vital for muscle repair and overall health.
– Carbohydrates: The rice provides necessary carbohydrates for energy. Choosing brown rice adds fiber to your meal.
– Vegetables: Including vegetables like cabbage not only adds crunch but also provides vitamins and minerals.
Balancing Indulgence with Health:
While katsu is a delightful treat, it’s essential to balance indulgence with health. Consider these modifications:
– Healthier Coating: Use whole wheat panko or ground almonds for a more nutritious breading.
– Alternative Proteins: For a lighter option, try chicken breast or tofu instead of pork for a vegetarian-friendly version.
– Portion Control: Serve smaller portions of rice or increase the vegetable ratio in your bowl to create a more balanced meal.
Tips for Perfecting Your Katsu Bowl
Creating the perfect Katsu Bowl requires practice, but here are some common mistakes to avoid and troubleshooting tips:
Common Mistakes:
– Soggy Katsu: Avoid overcrowding the pan while frying, as this can lower the oil temperature and result in soggy katsu. Fry in batches if necessary.
– Underseasoned Meat: Ensure that you season the pork well before breading it. Lack of seasoning can lead to bland katsu.
– Inaccurate Cooking Times: Always use a meat thermometer to check if the pork is fully cooked. Aim for 145°F (63°C) for optimal safety and taste.
Suggestions for Variations:
– Vegetarian Alternatives: Substitute the pork with eggplant or tempeh, breaded and fried in the same manner, for a satisfying vegetarian katsu.
– Flavor Variations: Experiment with different sauces such as spicy mayo or teriyaki to switch up the flavor profile of your katsu bowl.
Conclusion
The Crunchy Katsu Bowl is not only a delicious and satisfying dish but also a wonderful way to explore Japanese cuisine in your own kitchen. With a crispy pork katsu, fluffy rice, and fresh vegetables, this meal is perfect for any occasion. Embrace the cooking process, enjoy the rich flavors, and share this delightful dish with your loved ones. Whether you’re a seasoned cook or a beginner, making katsu at home can be both rewarding and fun. So gather your ingredients, follow the steps, and savor the deliciousness of your homemade Katsu Bowl!